Most wallpaper damage comes from three things: pulling the paper at too steep an angle, letting the backing dry out mid-peel, and using a metal scraper on a soft wall. Avoid those and the paper comes off in long sheets, the wall underneath needs only minor patching, and the job takes a few hours per room rather than a weekend of repair. Most of the work is patience, not strength.
The order matters more than the tools. Working out how to remove wallpaper without damaging walls comes down to identifying what is actually on the wall, keeping the adhesive wet while you peel, and scraping with plastic instead of steel. Skip ahead to the scraping stage and you will gouge drywall; skip the soaking and you will tear paper facing off in strips.
Table of Contents
- 1What You Need
- 2How to Remove Wallpaper Without Damaging Walls: Step-by-Step
- 31. Protect the room and test a small corner
- 42. Score the wallpaper and apply removal solution
- 53. Lift a seam and peel slowly
- 64. Scrape stubborn backing gently
- 75. Remove adhesive residue and clean the wall
- 86. Inspect, patch minor damage, and prepare the surface
- 9Common Mistakes
- 10Frequently Asked Questions
- 11Can I remove wallpaper from a rented apartment without damaging the walls?
- 12What is the safest way to remove wallpaper from painted drywall?
- 13Should I use a steamer, heat gun, or removal solution?
- 14How do I remove wallpaper adhesive without scratching the wall?
- 15What should I do if the wall or plaster starts coming off with the wallpaper?
- 16What kind of removable wallpaper won’t damage paint?
What You Need
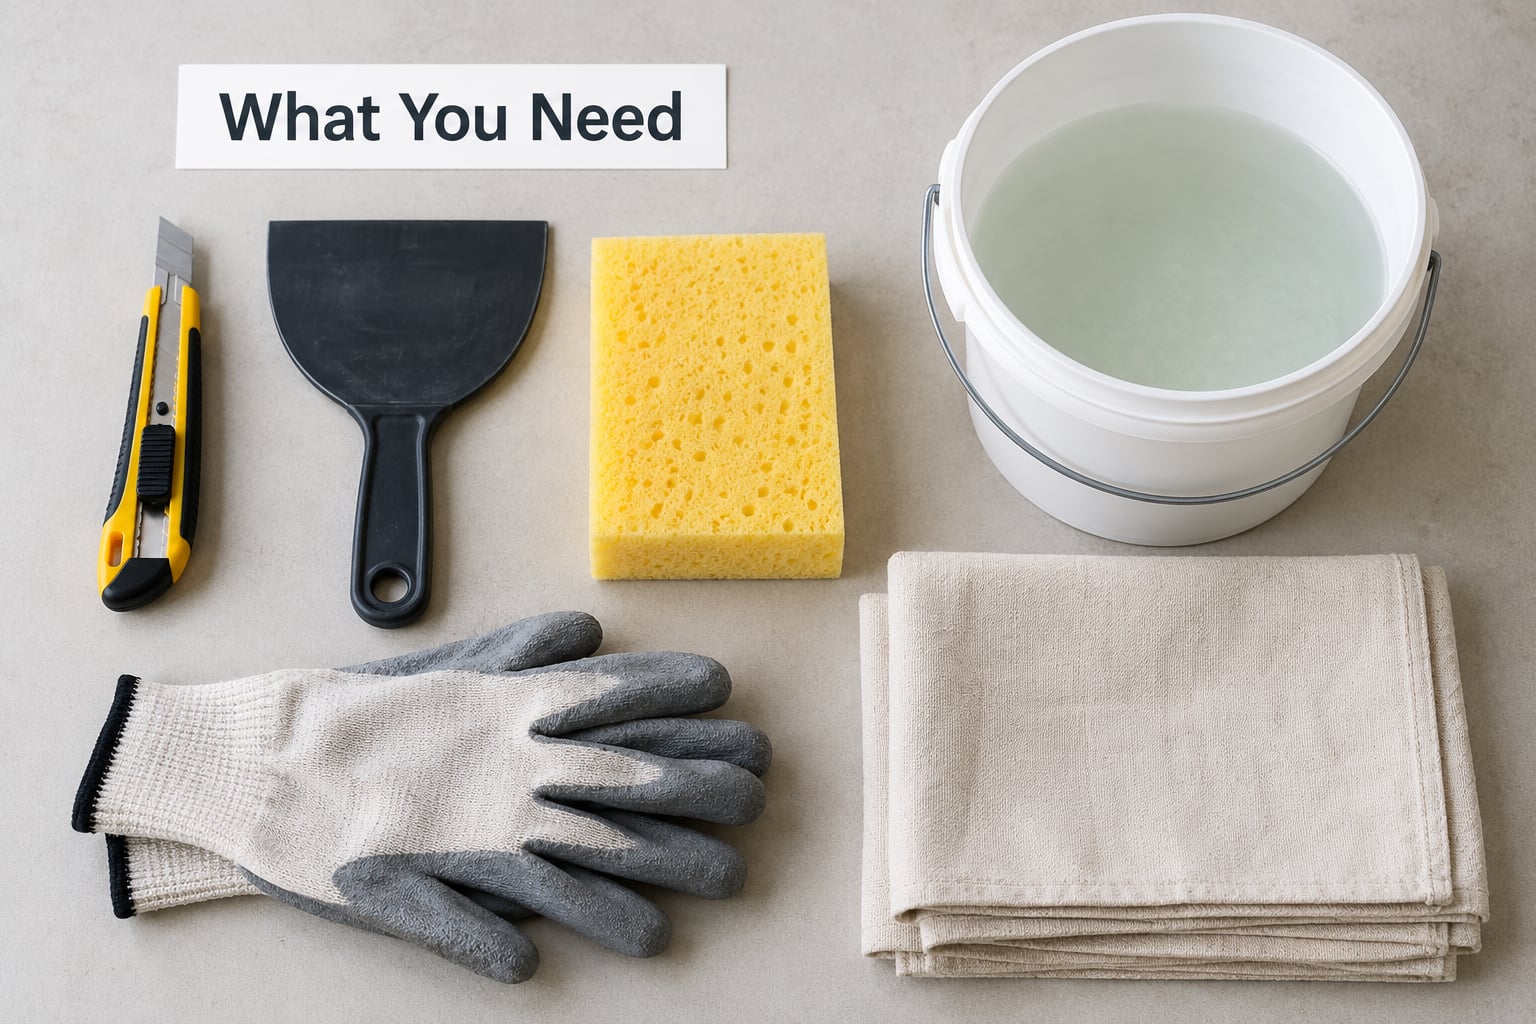
Gather everything before you start, because the middle of a removal job is the worst time to go looking for a bucket. Most of these are inexpensive and you probably already own half of them.
Wallpaper removal solution is the main consumable. Follow the label for dilution. A homemade substitute that works nearly as well is warm water with a small squeeze of dish detergent, or fabric softener in place of the detergent.
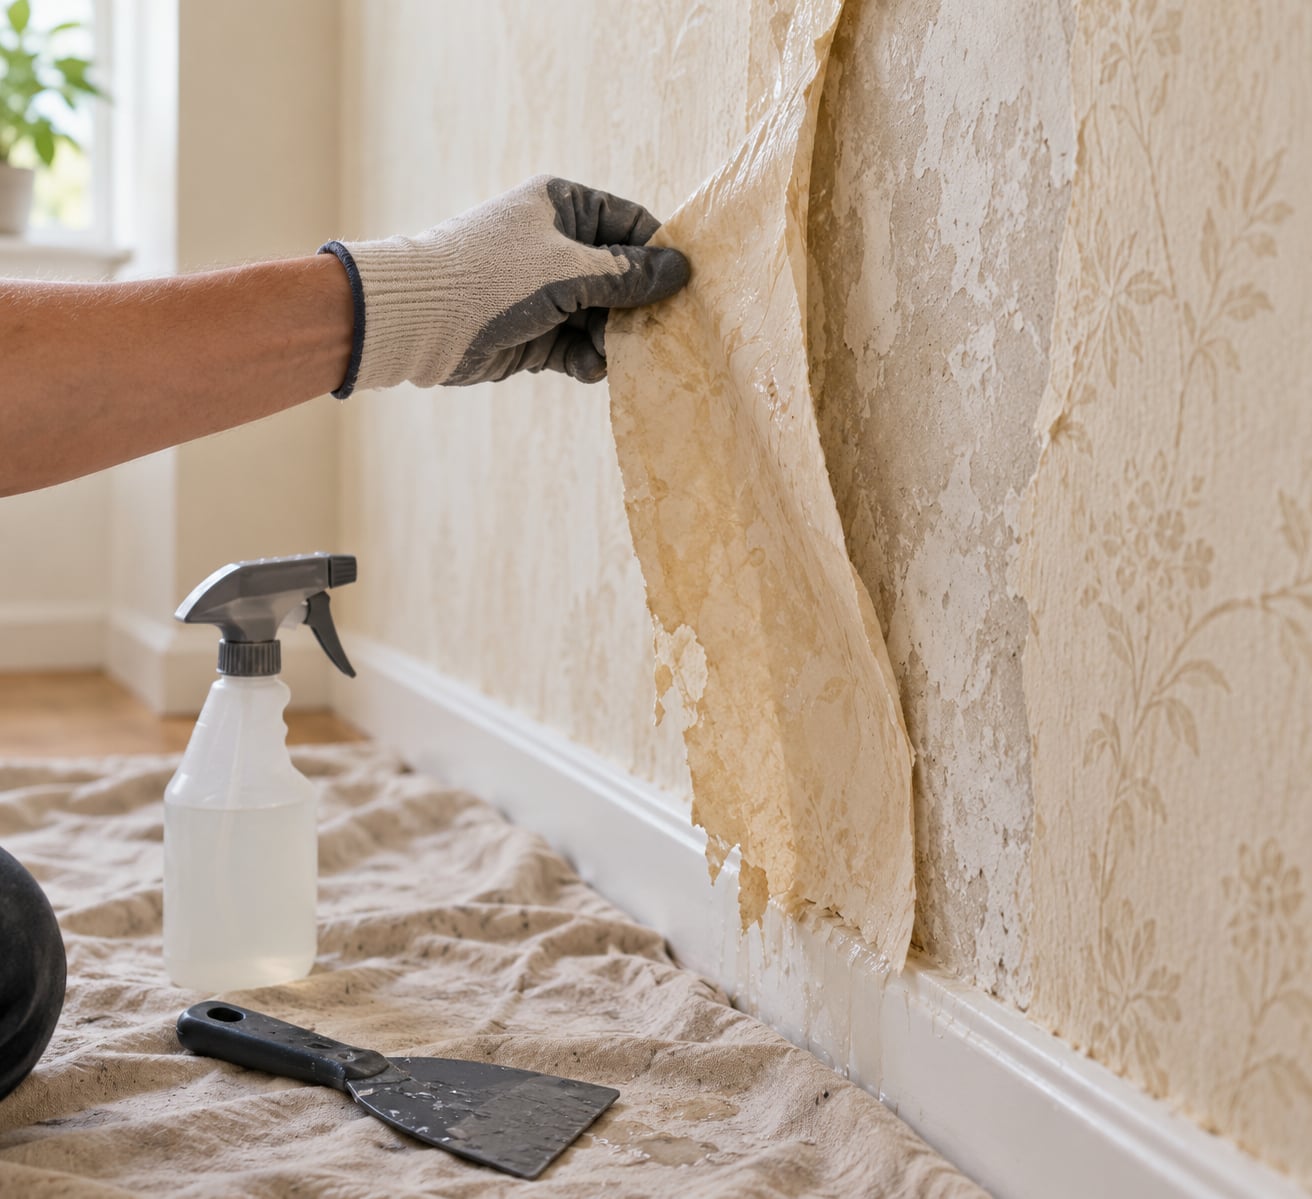
You also want a bucket and a sponge for keeping the wall wet, a spray bottle or hand garden sprayer for soaking sections evenly, a broad plastic putty knife (12 inches or wider is easier than a narrow one), a utility knife with fresh blades for scoring seams, and work gloves because wet paste is sticky and the paper strips can be sharp at the edges.
For protection and repair, lay down a plastic drop cloth or plastic sheeting taped to the baseboards, keep folded old towels for soaking up drips and wiping the floor first if you are working over finished flooring, and have painter’s tape plus outlet covers for switches and sockets. Stock a light spackle or joint compound, a sanding block, and a shellac-based primer if you expect to touch up the surface afterwards.
You do not need a steamer or a heat gun for most jobs, and you do not need strong chemical remover if the paper is paper-backed. Peelable and peel-and-stick wallpaper usually lifts with warm water, a slow pull, and nothing else. Buy the removers only after you have tested a corner and know what you are dealing with.
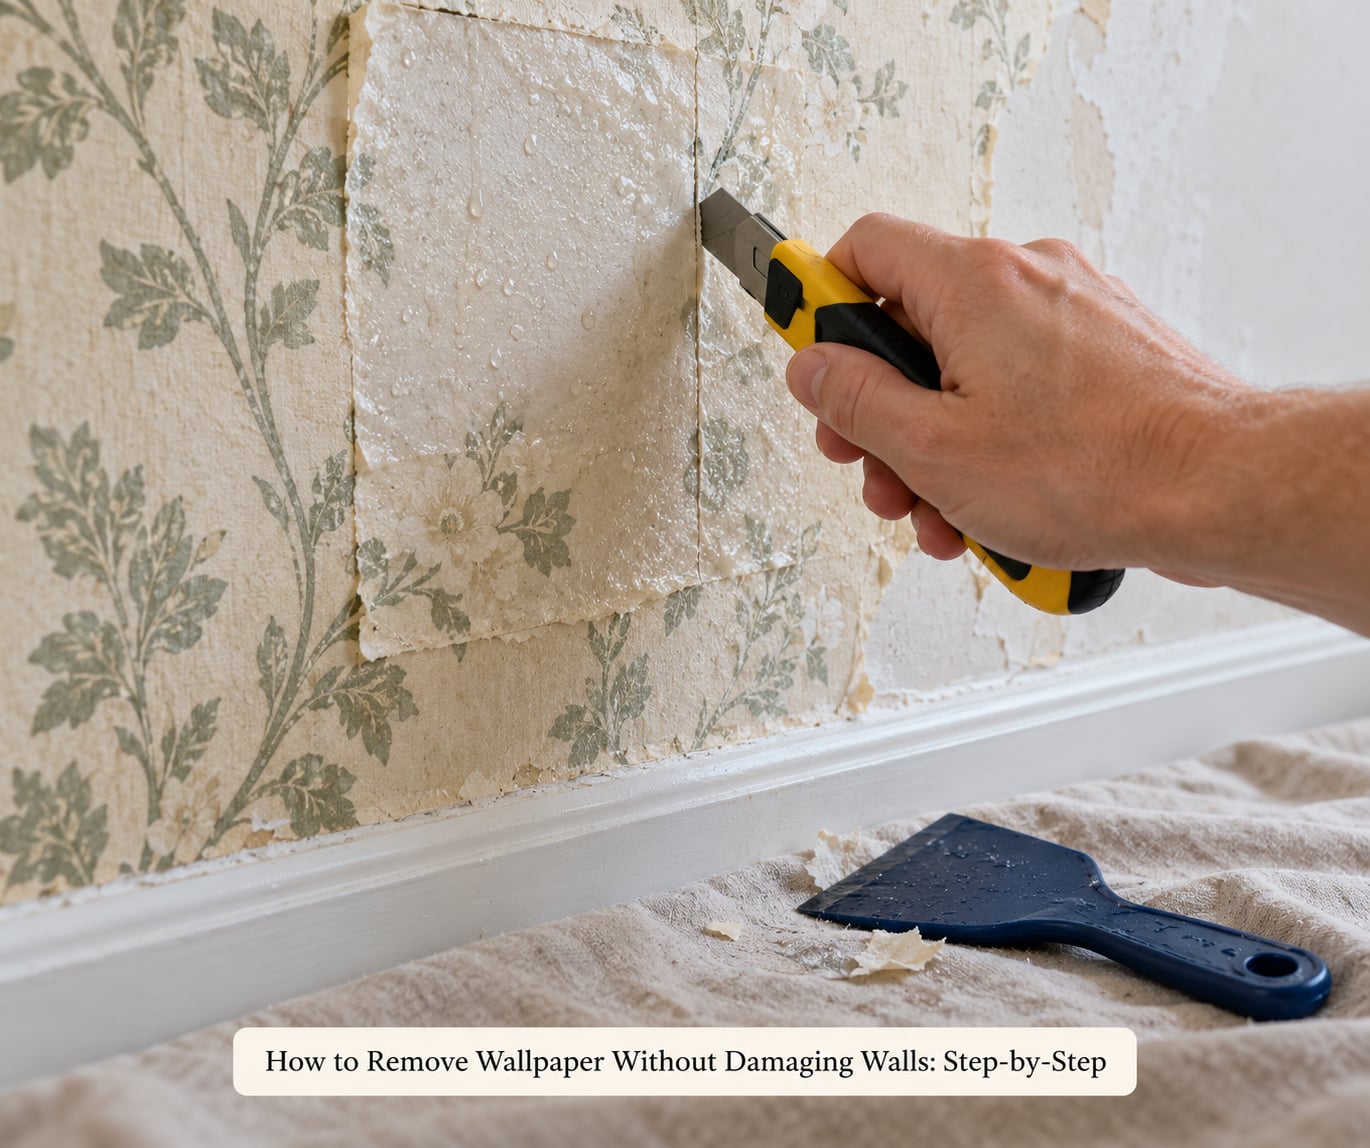
How to Remove Wallpaper Without Damaging Walls: Step-by-Step
1. Protect the room and test a small corner
Move furniture out rather than covering it, open a window for ventilation, and tape the drop cloth to the baseboards. If you will be using a steamer or a heat gun near outlets, switch off the circuit at the breaker and cover the plates with tape and a plastic sheet.
Then find a starting point where the paper already looks loose, often behind a radiator, an appliance, or in a closet corner. Lift it a little with the putty knife and look at the edge. That tells you which of four situations you are in:
| What you see | What it is | Safest approach |
|---|---|---|
| Paper lifts in one flexible sheet and leaves clean wall | Peelable or peel-and-stick vinyl | Warm water and slow peeling, no soaking needed |
| A decorative printed layer separates from a beige or grey layer underneath | Paper-backed wallpaper with a pasted backing | Score, soak, peel the top layer, then work the backing separately |
| The surface is glossy, slightly textured, and does not absorb water | Vinyl-coated or embossed waterproof paper | Score more aggressively, use a longer soak, and consider a commercial remover |
| The paper feels brittle and leaves orange-peel texture behind | Wallpaper painted over with several coats of paint | Expect a slow job; cutting and soaking beats pulling |
Test a 6 inch square before you commit. Score it lightly, soak it, wait five minutes, and pull at a shallow angle. If it comes away and the wall underneath is dry and intact, your method is right for the whole room. If it tears into fuzzy grey fibres, slow down and use more water, less force.
The substrate changes your caution level. Painted drywall over a stud wall behaves the way most people expect. Bare drywall paper facing is fragile, so keep the wall barely damp. Plaster is harder and softer at the same time, and it will crack if you let it dry out and then pry, so mist it and keep working steadily. Masonry and concrete-backed board handle water well and tolerate a stiff plastic scraper. A soft, hollow-sounding wall is a warning to slow right down.
One caution for older houses: wallpaper and the adhesive under it in buildings from before 1980 can contain asbestos. If the paper is very old, brittle, or you are unsure of the build, do not sand it, do not heat it, and do not tear it. Take a sample for testing, or hire a professional to strip it.
Once you know what is on the wall, choose your method. Most jobs only ever need the first two.
| Method | Best for | Wall risk | Mess |
|---|---|---|---|
| Warm water and dish detergent | Peelable paper, borders, light paste | Very low | Low |
| Commercial removal solution | Old paper-backed wallpaper, multiple layers | Low | Low |
| Steamer | Thick paper and stubborn old paste | Low, but keep it moving | Medium |
| Heat gun or hairdryer on low | Small stubborn patches and corners | Medium, scorches if you linger | Low |
| Painting over the paper | Sound paper in a rental or a quick refresh | None during removal | None |
2. Score the wallpaper and apply removal solution
Score the whole surface with the utility knife, cutting through the top layer only. Use shallow strokes, keep the blade flat against the wall rather than pointing it in, and work along seams and around corners where paste tends to be heaviest. Hold the knife so a slipping cut travels along the wall instead of into it.
Leave perforations roughly an inch apart. The point is to let water reach the adhesive underneath, not to slice the paper into confetti.
Mix or dilute your removal solution exactly as the label directs, then apply it with a sponge or sprayer and let it sit. Five to ten minutes is a reasonable starting window. Keep re-wetting as you work; paste that has already dried will tear the surface no matter how gently you pull.
3. Lift a seam and peel slowly
Start where you found a loose corner and work along the seam. Pull back against the wall at a shallow angle, close to the surface, rather than straight out into the room. That single detail is the difference between a clean sheet and a torn strip.
Work in sections about as wide as one drop of your paper, roughly 20 to 24 inches. Peel a section, spray the next, wait, peel again. Resist the urge to grab a long edge and rip; that is how backing paper ends up glued to the drywall facing.
On two-layer paper, peel the printed top layer off first and leave the backing to soak longer. The top layer strips away quickly; the backing is the part that has real paste on it and needs the full wet time.
4. Scrape stubborn backing gently
Hold the broad putty knife almost flat against the wall, tilted only a few degrees, with the blade facing away from you. Push the softened backing away from you rather than digging under it. Short strokes, light pressure, and a plastic blade rather than a metal one.
If a metal scraper is all you have, wrap the blade end in a thin cloth so it cannot bite into the surface. Vinyl-coated and embossed paper need more pressure than paper-backed, so those are the cases where a real razor scraper earns its keep, working carefully and changing the blade often.
Stop immediately if the paper you are lifting feels like part of the wall. On drywall, the paper facing is thin, fuzzy, and grey-brown; wallpaper backing is thicker, uniform, and often stained with paste. Pulling the fuzzy layer is the single most common way people damage walls, and it is not reversible without a skim coat.
5. Remove adhesive residue and clean the wall
Wash the wall with warm water and a little dish detergent using a damp sponge or cloth. Work in small circles and keep the wall damp rather than dripping. Rinse with a clean damp cloth, then dry with a fan or open window.
For sticky patches a sponge cannot shift, use the adhesive remover recommended for your wall finish, dab it on with a cloth rather than pouring it, and let it sit a few minutes before wiping. Avoid soaking drywall, which softens the paper facing and invites exactly the tearing you are trying to avoid. Skip aggressive solvents and skip sanding until the wall is completely dry.
Small paper flecks left in the texture of a painted wall can usually be lifted with a damp sponge and a little patience. If a fleck will not come free, leave it and handle it with filler during the repair stage.
6. Inspect, patch minor damage, and prepare the surface
Give the wall a full day to dry, then walk the room with your hand flat against the surface and look for raised edges, gouges, torn facing, and bits of stuck backing. Raised edges get a light sanding or a pass with a sanding block once the drywall is firm to the touch.
Fill small gouges and nail holes with spackle, let it dry, sand it flush with 120 to 150 grit, skim any torn facing with a thin coat of joint compound, then sand again. When you reach paint, use a shellac-based primer over the patched and adhesive-stained areas. Regular latex primer over glue residue will let the stain bleed through later.
Call a plasterer when the surface is cracked, hollow-sounding, or flaking in sheets. Plaster repairs need a different material and a different technique, and extensive plaster damage is not a weekend project.
A rough cost of materials for one room is modest, but the real number is time: plan on two to three hours for a straightforward room with paper-backed wallpaper, and expect much longer when you find a second layer hiding under the first.
Common Mistakes
Almost every ruined-wall story traces back to one of these. Work down the list before you start and you will probably avoid all of them.
Pulling straight out into the room. Corrective action: pull back against the wall at a shallow angle. Paper strips are stronger along the wall plane and far less likely to split the facing.
Letting the backing dry while you work. Corrective action: re-wet every section you are about to peel, and keep a wet sponge in your other hand.
Scraping at a steep angle with a metal blade. Corrective action: hold the plastic putty knife nearly flat and push the residue away from you in short strokes.
Soaking the wall. Corrective action: damp, not dripping. Wet drywall facing peels off in sheets and creates a repair job you did not sign up for.
Cutting deeply with the utility knife. Corrective action: score lightly in the same direction as the paper grain, and keep the blade flat to the wall.
Using heat near flammable materials. Corrective action: keep a steamer or hairdryer moving, stay off curtains and wood trim, and keep it well clear of outlets. Steam-only methods are useful on old paper-backed wallpaper, but heat plus patience beats heat plus speed every time.
Sanding a wall that is still damp. Corrective action: wait until it is fully dry. Sanding damp drywall gums up the paper and tears it.
Forgetting about the layer underneath. Peeling one strip often reveals a different pattern, a border, or a second layer of paper from an earlier owner. Stop and reassess before you start the next wall.
Removing paper you could have painted over. If the wallpaper is firmly attached, sound, and free of loose backing, a coat of quality primer with good adhesion will usually hold. Repainting is faster and safer than stripping, which makes it the sensible choice for a rental you plan to leave in a few months.
For a border only, score and soak the same way, then pull it back against the wall in one long strip instead of working it in small sections. Borders sit on top of the field paper, so they usually lift more cleanly than the wall covering underneath.
For renters, check your lease first. Removing temporary or peel-and-stick wallpaper that you or a previous tenant added is normally fine; stripping original paper the landlord expects to remain can put the deposit at risk. Take photos before you start so you can show what was there when you moved in.
One more trick worth knowing if you plan to hang paper again: paint a grid of painter’s tape on the wall before papering. When the wallpaper comes down, it peels away from the tape instead of the drywall. It adds an hour upfront and saves a skim coat later.
Frequently Asked Questions
Can I remove wallpaper from a rented apartment without damaging the walls?
Usually yes, as long as you check your lease and remove only what you added. Temporary peel-and-stick paper lifts with warm water and a slow pull, and leaves paint largely untouched. Original paper-backed wallpaper is a different story, since stripping it can take the paint and paper facing with it. Photograph every wall before you start, work in small test areas, and if anything tears, stop and patch rather than pushing through. When in doubt, ask the landlord in writing before you pull anything.
What is the safest way to remove wallpaper from painted drywall?
Soften the adhesive first and use the least force possible. Score the surface lightly, soak it with a warm water and dish detergent mix, wait five to ten minutes, then pull back along the wall at a shallow angle. Keep the wall damp as you work and scrape leftovers with a plastic putty knife held nearly flat. The danger on painted drywall is pulling off its paper facing, which looks fuzzy and grey-brown rather than like clean wallpaper backing.
Should I use a steamer, heat gun, or removal solution?
Start with solution. Warm water with a little dish detergent, or a commercial remover diluted as directed, handles most paper-backed wallpaper without any equipment. A steamer helps when the paste is old and stubborn and the paper is too thick to score well. A heat gun works on small stubborn patches, but keep it moving and away from outlets, trim and anything flammable. Begin with the least aggressive option and move up only if the paper will not budge.
How do I remove wallpaper adhesive without scratching the wall?
Wet it first, then lift it gently. Warm water and detergent with a damp sponge removes most paste from drywall and painted surfaces without any scratching at all. For sticky patches, dab on a wall-safe adhesive remover, leave it a few minutes, and wipe with a cloth. Hold a broad plastic putty knife nearly flat and push the softened residue away from you in short strokes. Never scrape dry adhesive with a metal blade, and never sand until the wall is completely dry.
What should I do if the wall or plaster starts coming off with the wallpaper?
Stop pulling immediately, set the paper down, and let the area dry fully. What you are seeing is likely the drywall paper facing rather than wallpaper backing, and tearing it further turns a small mark into a full skim coat. Once dry, patch the torn area with joint compound, sand it flush, and seal it with a shellac-based primer before painting. If the plaster is hollow, flaking in sheets, or the damage runs deep, stop and call a plasterer.
What kind of removable wallpaper won’t damage paint?
Self-adhesive vinyl and peel-and-stick paper are the safest, because they were designed to come off with warm water and a slow pull at a shallow angle. Woven or textured removable wallpaper uses a slightly stronger adhesive and may leave a faint residue that a damp sponge lifts. Nothing is completely risk-free: paint that is already peeling or a wall with bare drywall paper underneath can lift too. Test a small corner, use low heat at most, and never pull straight out into the room.
Start with a corner, not a wall. Test a small square, identify whether you have peelable paper, pasted backing or vinyl coating, then work with the least aggressive method that moves the paper. Soak it, keep it wet, pull back along the wall at a shallow angle, and scrape only what is left with plastic. If you learn to tell wallpaper backing apart from drywall paper facing before you start, most of the ways to damage a wall simply never come up.