To reduce drafts in an old house, you seal the biggest air leaks first, and those are almost never the windows. Warm indoor air leaks out through the top of the house and pulls cold air in through the foundation, walls, and service penetrations, a pressure cycle known as the stack effect. Most of the work is caulk, sealant, minimal-expanding foam, and weatherstripping you can do over a couple of weekends in 2026.
I’ve watched owners spend on new windows and still feel the same winter drafts, because the window is one hole among dozens and a small one at that. A leaky attic floor and an unsealed rim joist move far more air than a sash in bad shape. Find the leaks first, patch the big ones, and only then decide whether any window work is worth it.
A few old houses come with hazards worth naming before you cut anything open. Loose vermiculite insulation can contain asbestos, old paint can carry lead, and pre-1960s homes often have knob-and-tube wiring or cloth-sheathed cable running through the walls and attic. If you suspect any of those, stop and test the material first.
Table of Contents
- 1What You Need
- 2Step-by-Step: How to Reduce Drafts in an Old House
- 3How to Reduce Drafts in an Old House Step 1: Find the Leak Sources
- 4Step 2: Confirm the Source and Check for Moisture
- 5Step 3: Seal Small Gaps Around Trim and Openings
- 6Step 4: Replace or Add Weatherstripping
- 7Step 5: Insulate Gaps Inside the Wall
- 8Step 6: Check Doors, Basements, and Attics
- 9Step 7: Verify the Repair and Monitor the Building
- 10Common Mistakes
- 11Tips for Old-House Draft Repairs
- 12Frequently Asked Questions
- 13Why does my old house have drafts even after replacing the windows?
- 14What is the safest way to find where air is entering my house?
- 15Should I use caulk or expanding foam to stop drafts?
- 16Can sealing drafts around the attic make my house colder?
- 17How much does it cost to reduce drafts in an old house?
- 18When should I hire a professional instead of sealing a draft myself?
- 19Conclusion
What You Need
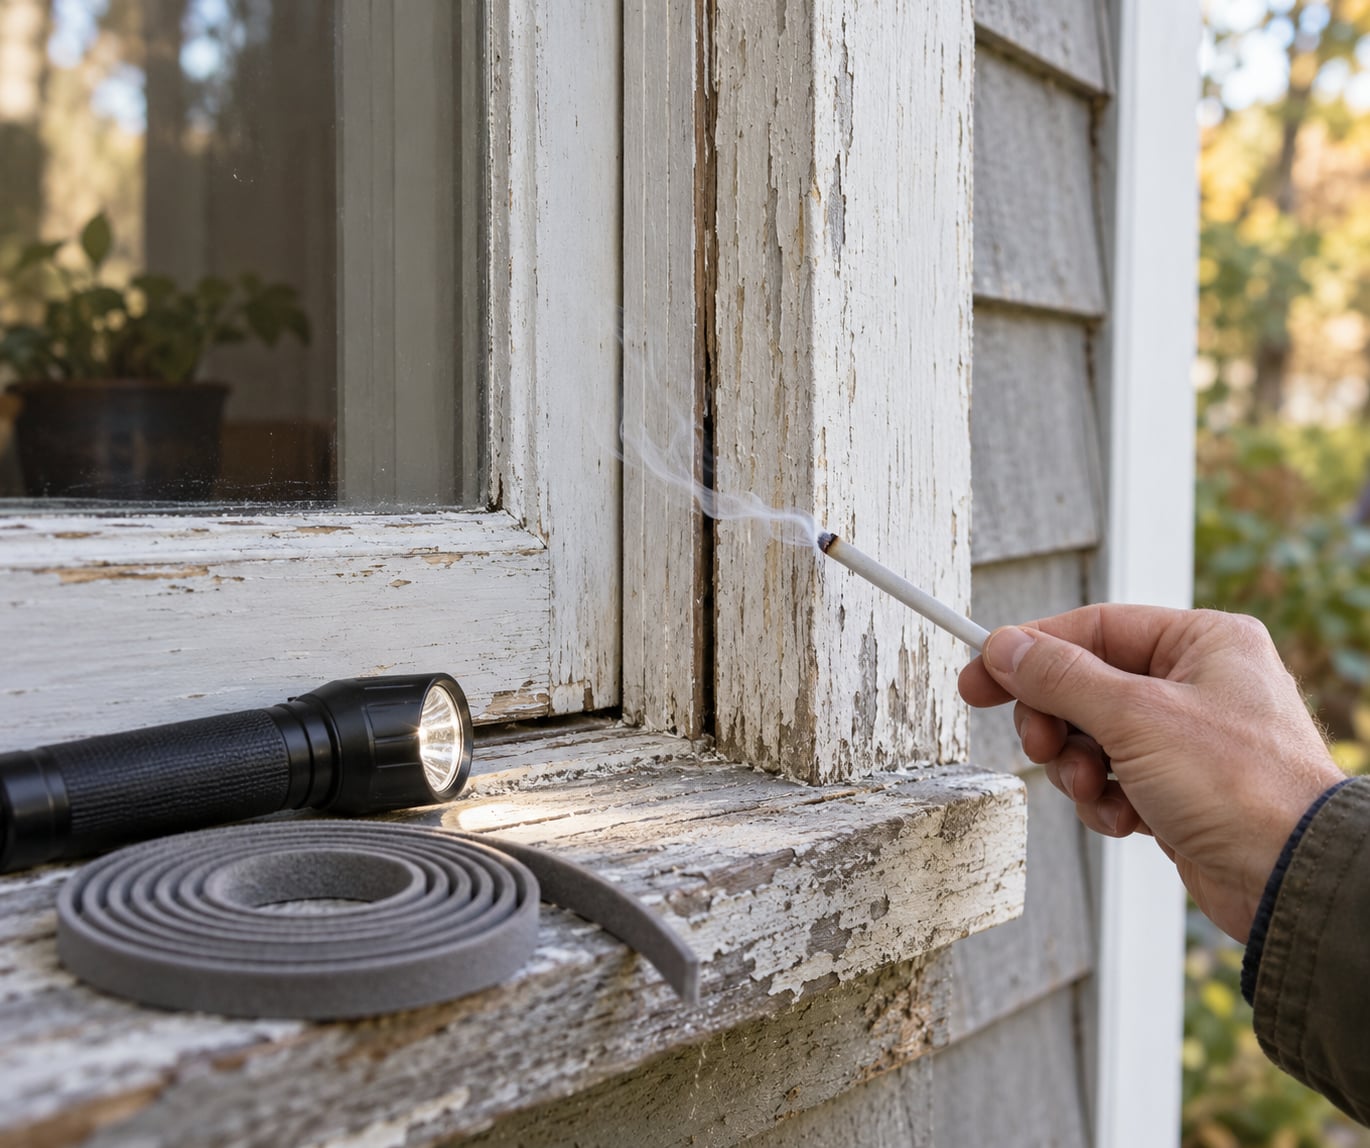
You can find most leaks in an old house with less equipment than people expect. A flashlight, a smoke pencil or a stick of incense, and a windy afternoon will do most of the work.
- Smoke pencil or incense stick for watching air movement at a suspected leak.
- Flashlight with a bright beam, for tracing daylight gaps along trim and sills.
- Tissue or thin ribbon to catch movement in still air.
- Tape measure to record gap width before choosing a product.
- Exterior caulk for joints between trim and siding, and for wider trim gaps.
- Weatherstripping in bulb, foam tape, or V-strip form for window and door edges.
- Minimal-expanding spray foam for narrow, deep gaps you cannot backfill with caulk.
- Acoustical sealant or RTV silicone for spots that flex, move, or see moisture.
- Safety gear: a respirator rated for particulates, gloves, and eye protection.
Not every gap takes the same product. Narrow, deep cracks near a service penetration want low-expansion foam; joints that move a little with the seasons want a flexible sealant; a window sash edge wants compressible weatherstripping. Put the wrong material in a gap and it cracks out within a season or two.
Step-by-Step: How to Reduce Drafts in an Old House
How to Reduce Drafts in an Old House Step 1: Find the Leak Sources
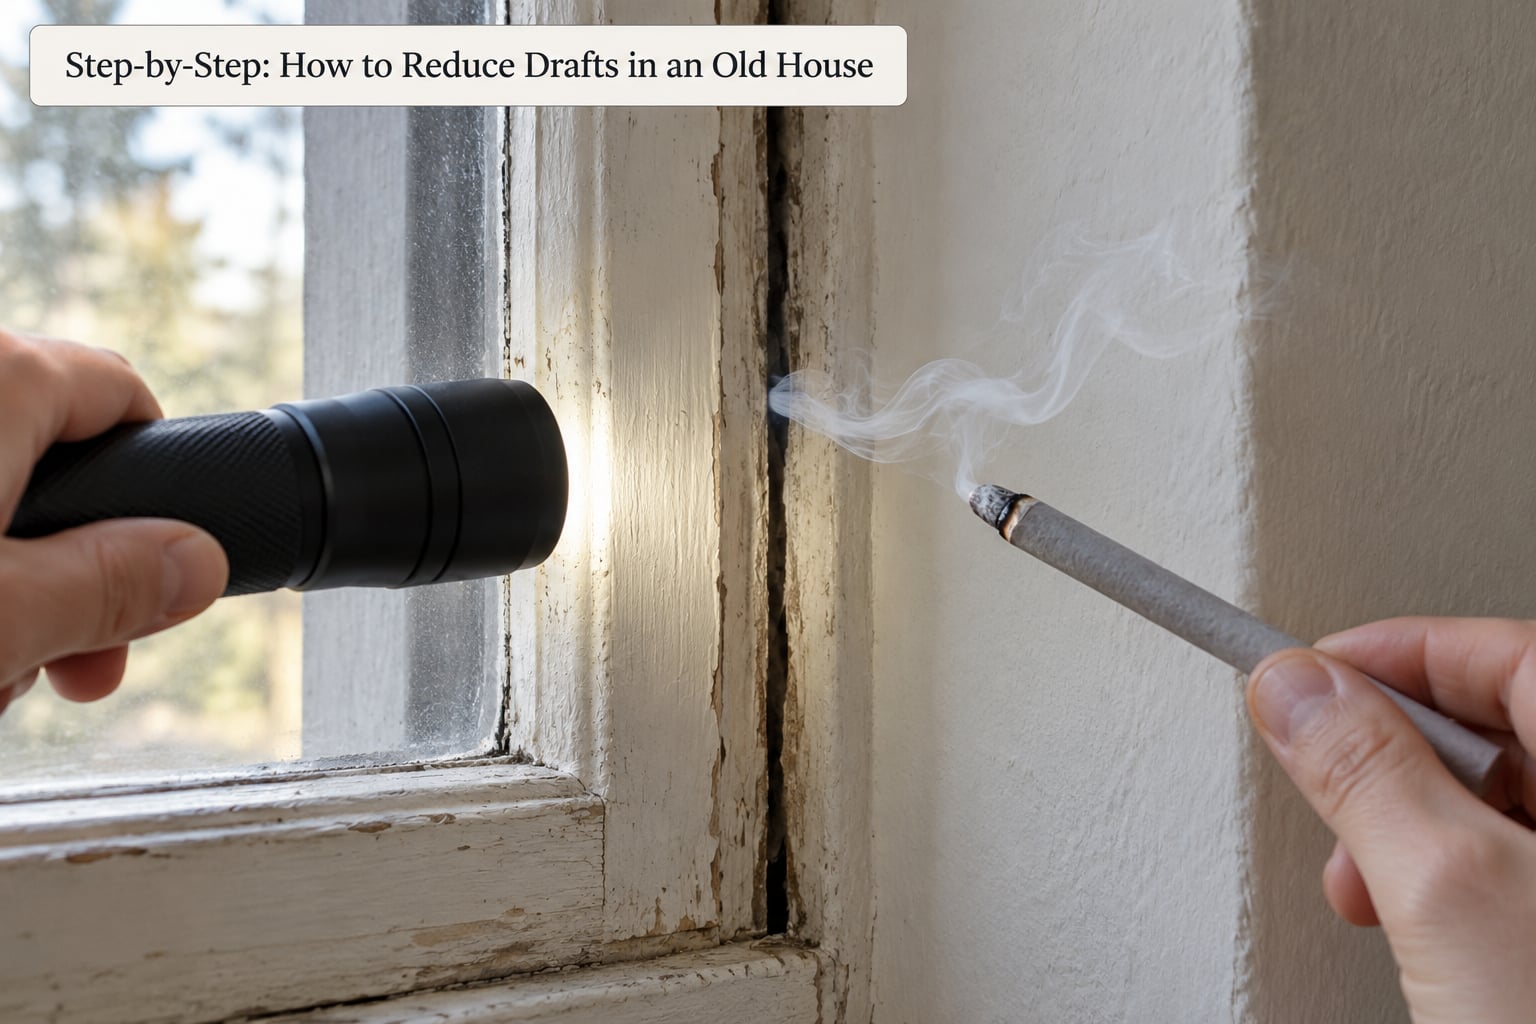
Test on a windy, dry day, when air movement makes leaks obvious. Shut off interior doors to a single room so the pressure difference is strong, then hold a smoke pencil or incense stick a few inches from each suspect joint and watch the smoke stream.
A tissue held near the gap works nearly as well in still air, and it is cheaper. Warm spots and cold spots on a cold morning tell you where to look too, since air moving past the back of your hand has a distinct chill.
Check the obvious places first: window and door perimeters, the sash-to-frame gap, electrical outlets and switches, where pipes enter the house, baseboards where they meet the floor or wall, the attic access hatch, and any recessed light or duct boot in a ceiling. Work up from the basement and go toward the attic, because that is the direction air travels.
If you want a stronger diagnostic without an expensive test, depressurize the house on purpose. Run the bathroom and kitchen exhaust fans, the dryer, and a central vacuum at the same time with interior doors closed. Leakage paths now have to move much more air, and a smoke pencil will show you exactly which ones are open.
Step 2: Confirm the Source and Check for Moisture
Before sealing anything, look at the surfaces around the leak. Water stains, soft or crumbly wood, peeling paint in a repeating pattern, white powdery residue, or a musty smell all point to a moisture problem that sealant alone will not fix. It will trap the wet condition inside the assembly and make it worse.
Look for insect activity near the same spot, particularly mud tubes along the sill or frass in the attic. If you see mud tubes, a large leak, or rot, call it in for an inspection before you caulk over it.
Check whether the gap sits inside a wall cavity or near wiring. In old houses, knob-and-tube runs and early cloth-sheathed cable often branch through the same chases you would be spraying. Seal around, never across, and keep foam off anything energized.
Step 3: Seal Small Gaps Around Trim and Openings
For a gap under an eighth of an inch along window or door trim, exterior caulk is the right material. Cut the nozzle at a 45-degree angle, push a bead into the joint rather than smearing it on the face, and tool it smooth with a wet finger or a piece of card stock.
Surface preparation is most of the repair. Scrape off loose, cracked, or peeling paint, brush away dust, and let the joint dry. Old houses hold moisture in their trim, and caulk applied over damp or flaking paint peels off in a few months. If the gap is wider than a quarter inch, back it with a loose fiber material such as a fiberglass strip before caulking, or the bead will sag.
Seal pipe penetrations with a foam compatible with the pipe material, and use fireblock caulk where the gap sits inside a floor assembly. Seal outlet and switch box gaps with putty or an acoustical sealant rated for electrical boxes, and cover the seam with a fire-rated box cover or intumescent pad so warm air cannot carry combustion gases into the box.
Give caulk the cure time printed on the tube before you judge it, and give foam the same respect. Most failures come from testing a repair in the first hour rather than from the wrong sealant.
Step 4: Replace or Add Weatherstripping
Weatherstripping closes the moving gap between a sash and its frame, which caulk cannot do. Use bulb or foam-tape weatherstripping on sash edges that press tightly against the frame, and V-strip or tension seal on sides where you need a tighter, adjustable bite.
Measure and cut each strip slightly longer than the run, miter the corners, and clean the surface before sticking it down. Paint build-up on old windows will stop a strip from bonding, so scrape the frame back first. Adhesion matters more than the product name here.
Close the window or door and check compression. You should feel firm resistance when you operate it, with no gap you can see light through, and the window should still open and close without forcing. Over-compressed foam tape stops sealing within months because it takes a permanent set.
On exterior doors, the draft usually lands under the door rather than around the jamb. A sweep or automatic threshold seal addresses that, and on a heavy antique door, a compressible seal that the door can still close on is better than a rigid one.
Step 5: Insulate Gaps Inside the Wall
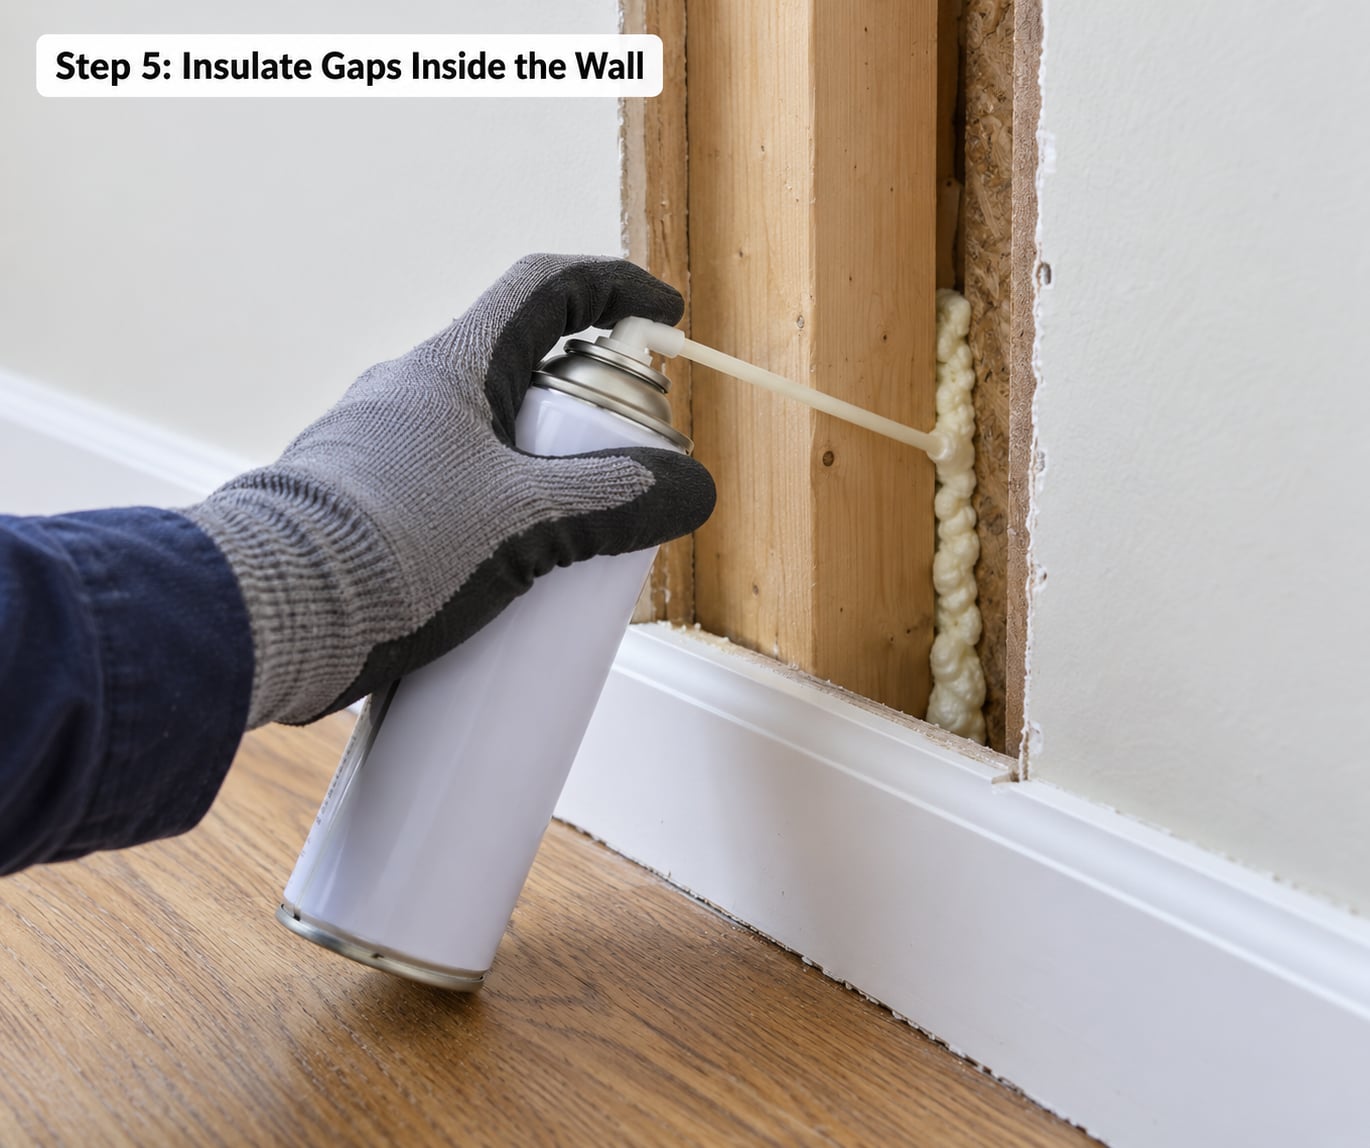
Where you can reach a gap without opening the wall, minimal-expanding foam is the fastest fix. The sill plate where the joist meets the foundation, the top plate at the attic floor, and gaps where service pipes and ducts enter are all accessible from a basement or crawlspace.
Keep the can well above the surface so the foam expands into the gap rather than across it, and remember that a small bead becomes a large one. Low-expansion foam is the only type to use in a wall cavity, because gap-filling foam can lift trim, crack plaster, or bow a lath-and-plaster wall as it cures.
Skip the work and hand it to a professional when the gap is concealed behind finished surfaces, or when the space contains wiring, a junction box, a vent, or a chimney. Balloon framing carries open stud channels straight from the basement to the attic, so air can travel a long way without a visible hole anywhere in the house.
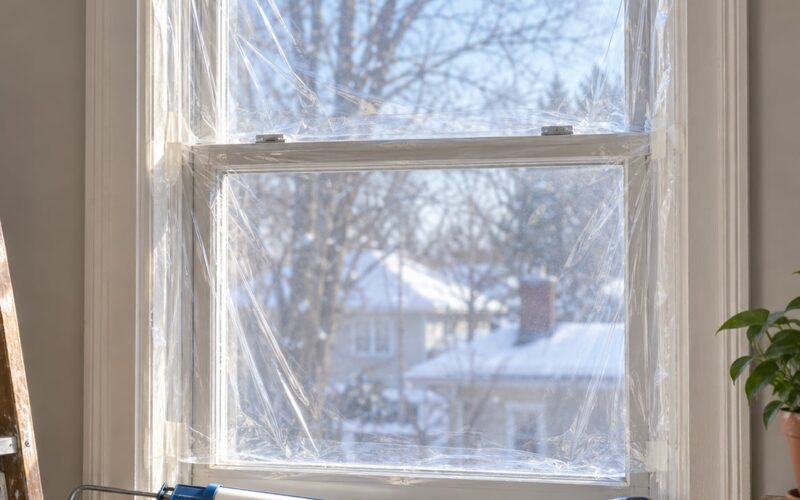
If you have single-pane windows and do not want to touch the wall, an interior storm panel or a fitted window insulation kit buys you a season or two of comfort with no construction involved. It does not stop air moving through the wall itself, so treat it as a comfort measure, not a fix.
Step 6: Check Doors, Basements, and Attics
The basement and crawlspace usually hold the biggest leaks: the rim joist band around the top of the foundation, the sill plate, wall-to-wall seams in a crawlspace floor, and open penetrations for water, gas, and drain lines. Seal the rim joist area with foam and back it with blocking where animals could reach it, and cap unused pipes from the outside.
In the attic, the priority is the plane where living space meets unconditioned space. Seal the top plates, around every wire and pipe run, at the attic hatch edges, and at any interior wall that stops at the floor. Professionals also seal the wall and ceiling penetrations at that same plane, because air entering there bypasses the insulation entirely.
Be careful about combustion appliances, a fireplace, or a garage door opening into the house. Sealing those areas changes the makeup air available to a gas furnace or water heater, so an unvented or older appliance needs dedicated combustion air before you tighten the envelope.
Work that involves a rim joist you cannot reach, standing water, a structural sill repair, or a roof or chimney opening is not a weekend project. Leave it to a contractor who has looked at it.
Step 7: Verify the Repair and Monitor the Building
Retest on the next windy day using the same smoke pencil and the same sequence you used before. A sealed gap shows no smoke movement at all; a gap you only partly filled shows a thinner stream, which tells you to backfill it or switch materials.
Watch the repair for a couple of weeks. Caulk that fails shows up as a curled edge or a bead that has pulled away from the trim, and foam that failed leaves a hard yellow blob hanging in the gap. Remove failed material back to clean, sound surface before you redo the job.
Notice the practical results: the cold stripe along the floor stops, the room holds heat after you turn the heat down, and the drafts you used to feel near the door are simply gone. Track what changed so you know where to invest next.
Write down what is still moving air after a month. That list is far more useful to a contractor than a general complaint about the house being drafty, and it often points to a bigger assembly problem worth a proper diagnostic.
Common Mistakes
Sealing before locating the leak is the most common error, and it is expensive. Caulk spreads beautifully over a surface that leaks somewhere else, so you end up with a tidy house and the same draft. Find first, always.
Using gap-filling foam where minimal-expansion foam belongs causes real damage. It expands hard enough to lift a door frame off its hinges, crack plaster, or push a wall panel out of square, and it is very difficult to remove.
Blocking ventilation is the mistake with real safety consequences. Do not seal an attic beyond exhaust fans, do not seal a clothes dryer duct, and do not close off the combustion air supply for a furnace, water heater, or floor furnace. Blocking a clothes dryer duct can also push moist exhaust into the living space.
Covering drainage paths causes rot. If water needs to reach an exterior wall from inside that wall, sealing the path traps it in the sheathing and framing instead.
Painting over uncured sealant is a quick way to waste the work. Sealant that gets a coat of paint before it cures stops shedding water, traps moisture in the joint, and peels within a season.
Disturbing suspect materials is how people end up in a hazmat situation. Sanding, sawing, or even pushing loose vermiculite insulation around can release asbestos fibers, and scraping lead paint before it is tested does the same with lead dust. Test first, or work on areas you already know are clean.
Tips for Old-House Draft Repairs
Work from the largest visible leaks down to the small ones. Roughly a quarter of the air moving through a typical old house passes through a handful of big openings, and closing those does more than a whole weekend of trim work.
Preserve drainage and ventilation as you go. Every vent you seal needs a replacement path, and a house that was leaky by accident may not have any built-in mechanical ventilation to fall back on. If you seal a lot of envelope, a heat-recovery or energy-recovery ventilator is the responsible companion upgrade.
Match the product to the material and temperature. Some sealants get stiff and crack in cold weather, some foam turns brittle, and rigid plastics expand and shrink enough to break a joint on a house that moves through the seasons.
Keep a safe distance from chimneys, flues, and combustion vents. Those clearances are based on heat, not airflow, and no sealant or foam belongs inside them.
Bring in qualified professionals for anything structural, electrical, gas, roofing, or hazardous-material work, and for a blower door test if you want numbers rather than guesses. A measured leakage rate tells you exactly what you gained and whether more work is worth doing.
Frequently Asked Questions
Why does my old house have drafts even after replacing the windows?
Because windows are rarely the largest leak. Warm air leaves through the attic and roof plane, and that escaping air pulls cold air in through the foundation, rim joist, wall plates, and pipe penetrations. New windows sit in a small hole in that larger system, so the cold air still arrives, just from somewhere else. Seal the top and bottom of the envelope first, then judge the windows.
What is the safest way to find where air is entering my house?
Close interior doors, then run the exhaust fans, dryer, and central vacuum together on a windy day. The house depressurizes slightly and every leak path moves much more air. A smoke pencil or incense stick held a few inches from suspect joints shows the direction and size of the flow without any invasive work. Add gloves, eye protection, and a respirator if you may be around old insulation materials.
Should I use caulk or expanding foam to stop drafts?
Use caulk for flat or wide joints between trim and siding, and minimal-expanding foam for narrow, deep gaps you cannot backfill, such as pipe entries and sill plates. Gap-filling foam expands hard enough to lift frames and crack plaster, so keep it out of wall cavities and finished openings. Flexible movement gets acoustical sealant or RTV silicone rather than either of those.
Can sealing drafts around the attic make my house colder?
It makes the house colder if you trap cold air inside the attic volume or cut off combustion air for a gas appliance. Seal at the plane where living space meets unconditioned space, keep soffit and ridge vents clear, and confirm that furnaces, water heaters, and fireplaces still have their required air supply. Done correctly, sealing the attic floor warms the rooms below it.
How much does it cost to reduce drafts in an old house?
A weekend of DIY air sealing with a few tubes of caulk, a can of minimal-expansion foam, weatherstripping, and a smoke pencil costs far less than a single contractor visit. Blower door testing and large-scale sealing by a pro run into the thousands, with cost driven mainly by access, whether finished surfaces have to be opened, and how much of the foundation and attic you can reach. Get a diagnostic before accepting a big number.
When should I hire a professional instead of sealing a draft myself?
Hire a pro when the leak sits behind finished surfaces, inside a wall cavity with wiring or a vent, at a rim joist you cannot reach, or around a chimney or combustion appliance. Old vermiculite insulation, untested lead paint, and knob-and-tube wiring all call for assessment first rather than a weekend project. A blower door test is also worth hiring if you want measured results instead of a draft that seems smaller.
Conclusion
Start on the next windy day with a smoke pencil, find the largest moving air in the house, and check that area for moisture and rot before you seal anything. Patch the attic plane, the rim joist, and the foundation penetrations first, then handle window and door edges with weatherstripping, and leave concealed cavities, chimneys, and combustion areas to a professional. If your house stays cold after that, the problem is probably the heating system or duct leakage rather than another hole to hunt.