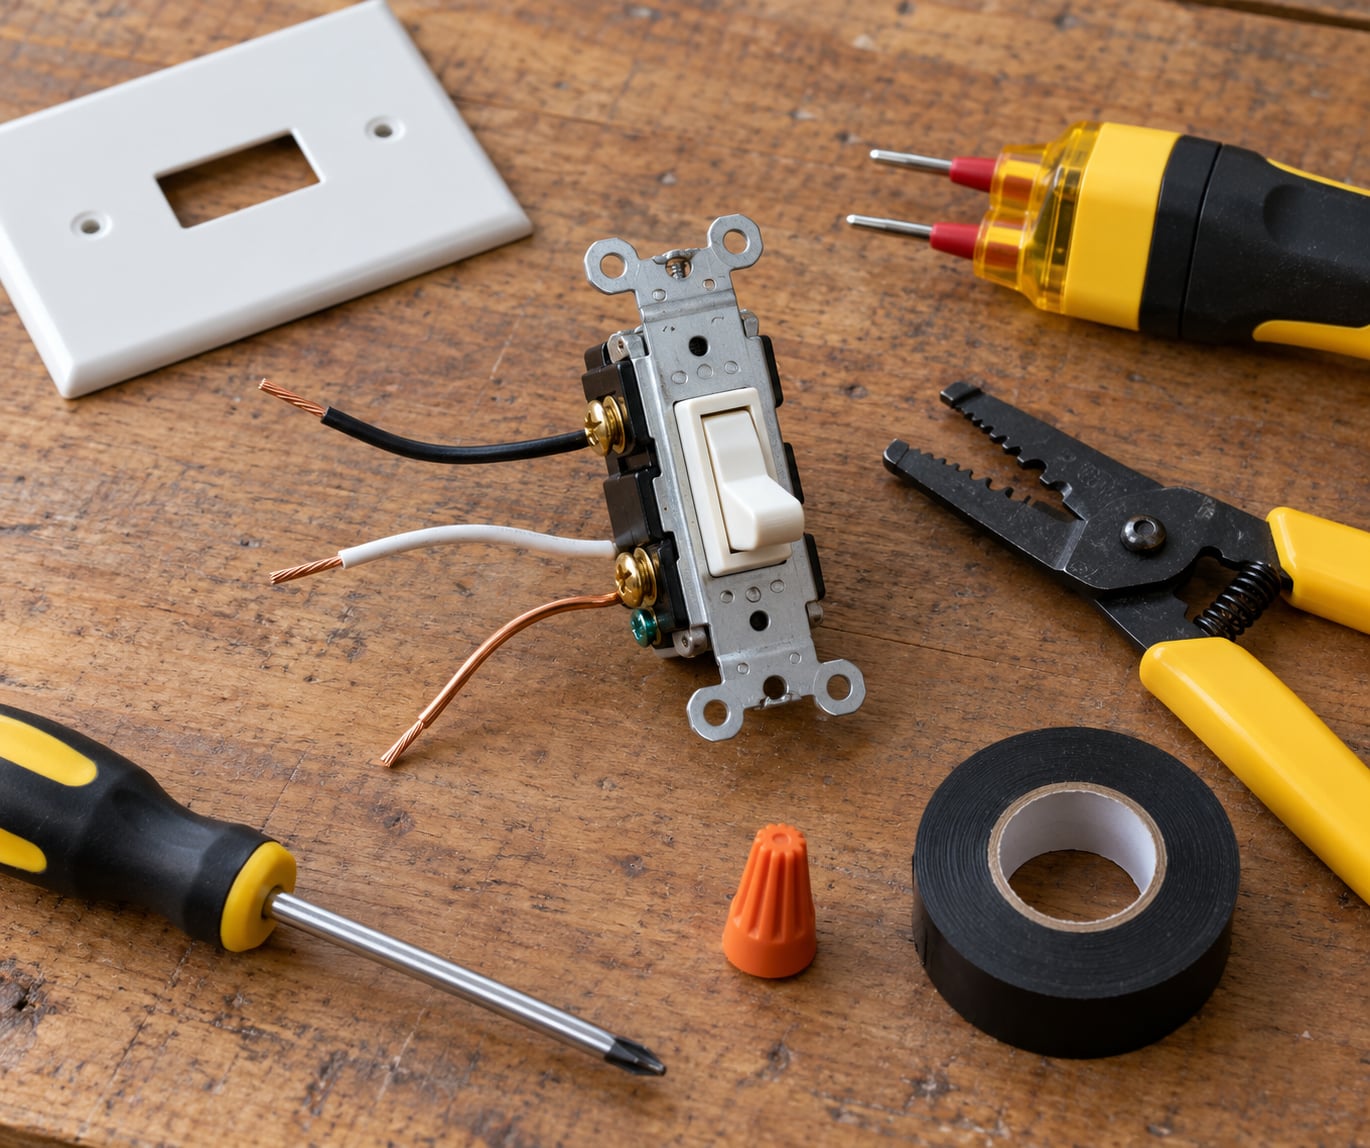
To replace a light switch safely, shut off the circuit at the breaker, confirm the wires are dead with a voltage tester, disconnect the old switch, and wire the new one to the same terminals. On a standard single-pole switch that is 20 to 30 minutes of work and a few basic tools.
The part people skip is the testing. Flipping a wall switch does nothing to the current running behind it, so a switch can feel dead and still be sitting on a live circuit. Assume every conductor is energized until a tester says otherwise.
This guide covers the single-pole switch, the one that controls a light from a single location. It also covers what changes when your box holds a three-way switch, a dimmer, or old wiring, and where you should stop and call a licensed electrician instead.
Table of Contents
- 1What You Need
- 2The tools that matter
- 3Which replacement switch might fit
- 4Warning signs that mean stop, call an electrician
- 5Step-by-Step
- 6Step 1: Kill the power at the breaker
- 7Step 2: Verify the circuit is dead
- 8Step 3: Remove the wall plate
- 9Step 4: Identify and label the wires
- 10Step 5: Disconnect the old switch
- 11Step 6: Connect the new switch
- 12Step 7: Mount the switch and refit the plate
- 13Step 8: Restore power and test
- 14What changes on a three-way switch
- 15Dimmer and smart switch swaps
- 16Old wiring you should not improvise on
- 17Common Mistakes
- 18Leaving a neutral unconnected or un-capped
- 19Failing to verify power is off
- 20Over-tightening or under-tightening the screws
- 21Mixing up the terminals
- 22Forgetting the ground or losing the box bond
- 23Forgetting to photograph the wiring
- 24Testing with power on
- 25Stripping too much copper
- 26Practical safety habits
- 27Frequently Asked Questions
- 28Do I need to turn off the electricity before replacing a light switch?
- 29Can I replace a light switch that has no ground wire?
- 30What wire colors connect to a standard single-pole light switch?
- 31Can I use a dimmer switch where a regular light switch was installed?
- 32Why does the new light switch feel warm or stop working immediately?
- 33When should I call an electrician instead of replacing the switch myself?
- 34The Takeaway
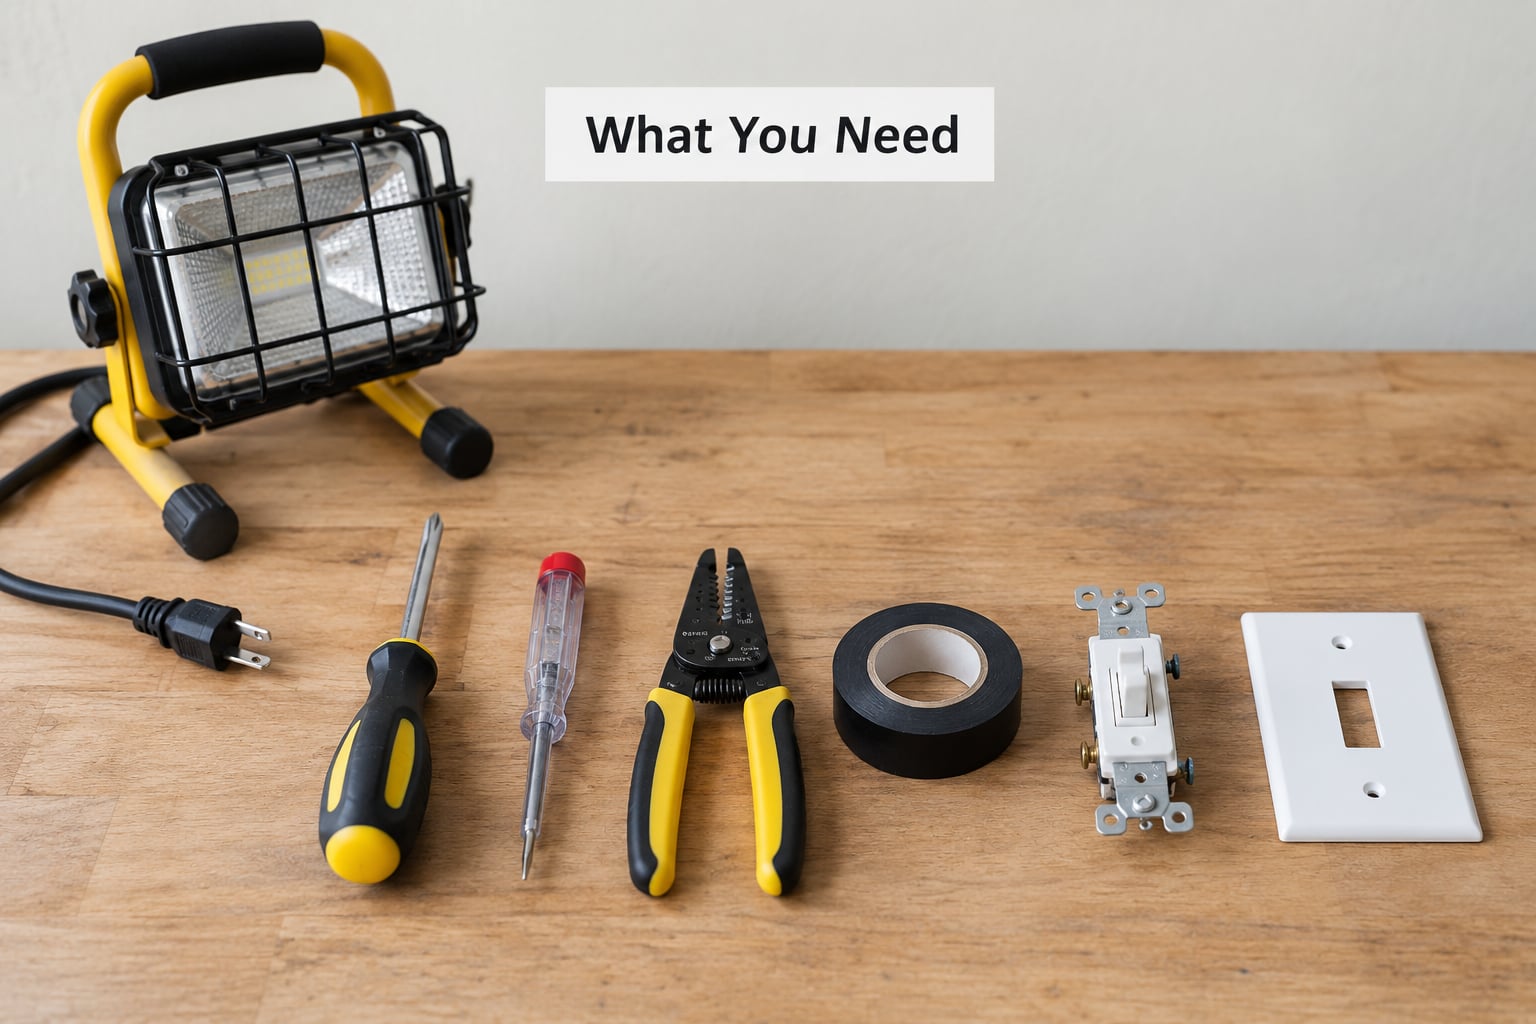
What You Need
The tools that matter
- Two-pole voltage tester or multimeter. This is the one tool you cannot skip. A non-contact pen is a useful second opinion, but it can give false readings on some cables, so confirm with a tester that touches both terminals and the ground screw.
- Flathead and Phillips screwdrivers. Insulated shafts are worth having, and a short 3/8 inch driver makes working inside a deep box far easier than a long shaft.
- Wire strippers and needlenose pliers. Plain pliers for bending and guiding wires.
- Wire connectors. Wire nuts or, better, push-in connectors rated for the wire you have. If your new switch has screw terminals, use them rather than the push-in holes.
- Electrical tape and a permanent marker. For labeling wires before they come off and for flagging anything non-standard.
- A replacement switch. Match the type and rating of the existing one, and the plate style if you are changing looks.
- A flashlight and a small trash bag. For holding screws and for parking the old switch parts out of your way.
Most electricians I have talked to say the same thing about push-in, or backstab, connections: they work, but screw terminals hold better over years of heat cycles and are easier to inspect. If you have the choice, wrap the bare wire clockwise around the screw and tighten it so the copper is no longer visible.
Which replacement switch might fit
| Switch type | Wires in the box | Terminal layout | Where you find it |
|---|---|---|---|
| Single-pole | Two or three plus ground | One common screw, one brass or red screw, green ground screw | A light controlled from one place only |
| Three-way | Three or four plus ground | Black common screw, two brass traveler screws, green ground screw | Stairways, hallways, long rooms with a switch at each end |
| Four-way | Four plus ground | Four traveler screws, no common | Middle switches between two three-ways |
| Dimmer | Same as the switch it replaces | Two or three plus ground, sometimes a deep body | Replacing a single-pole or three-way switch, never where the wire is not rated for it |
| Smart switch | Requires a neutral at the box | Line, load, neutral, ground | Many need a neutral in the box; see the section below |
If the box holds two or more switches side by side in a multi-gang, the count of wires tells you nothing on its own. Photograph everything before disconnecting, and read the label on the back of the old switch body, where the manufacturer prints the type.
Warning signs that mean stop, call an electrician
- Silver or gray wires that are stiff, or a faint white coating on the copper. That is aluminum wiring. It needs connectors specifically marked CO/ALR or AL, and mixing it with copper is how connections heat up and start fires. Most whole-house rewires are the better fix.
- Cloth-covered or rubber-sheathed cable, ceramic sockets, or knob-and-tube wiring. If you see it, this is not a beginner job.
- No ground wire at all. Older homes sometimes have ungrounded switch boxes. Adding a switch there means running a ground, which means opening walls.
- Melted, browned, or brittle wire insulation, a warm or buzzing switch, or scorch marks inside the box. That is an active fault, not a worn part.
- You cannot identify which breaker feeds the box, or the breaker trips again immediately after you restore power.
- Any work inside the panel itself. Live bus bars behind the deadfront stay energized even with the main off.
Renting the place? Tell the landlord before you touch anything, since the wiring is the owner’s responsibility and many leases require a licensed trade.
Step-by-Step
Step 1: Kill the power at the breaker
Find the breaker panel, usually in a garage, basement, closet, or outside wall. If the breakers are labeled, read the labels first. If they are not labeled, do not guess one switch at a time with the light on.
Instead, turn off the main breaker, then walk to the switch and confirm the light is out. Some boxes hold more than one circuit, so while the main is off, toggle each switch in the room and leave everything off. Turn the main back on, then move straight to step 2 and test.
Step 2: Verify the circuit is dead
This is the step that separates a careful job from a dangerous one. Touch the two-pole tester across the two screws on the switch body, then from each screw to the green ground screw, and finally to the metal box. Nothing should light up or beep anywhere.
Test the tester on a known live outlet first and after, so you know it works. If it reads live somewhere you did not expect, the box is on another circuit or a neutral has become a switched hot. Stop and sort that out before proceeding.
Step 3: Remove the wall plate
Unscrew the two or more mounting screws holding the switch plate. If paint has run across the screws or sealed the plate to the drywall, score the paint line with a utility knife and work gently. Score the whole perimeter, not just near the screw, or the drywall tears.
Pull the switch forward out of the box, supporting it so the wires do not carry its weight. You now have a few inches of slack.
Step 4: Identify and label the wires
Take a photo first. Users on DIY forums repeat this advice constantly, and it is the cheapest insurance in the job, because the photo tells you where each wire goes even after you have the new switch in your hand.
| Wire | Usual color | What it does | Where it lands on a single-pole switch |
|---|---|---|---|
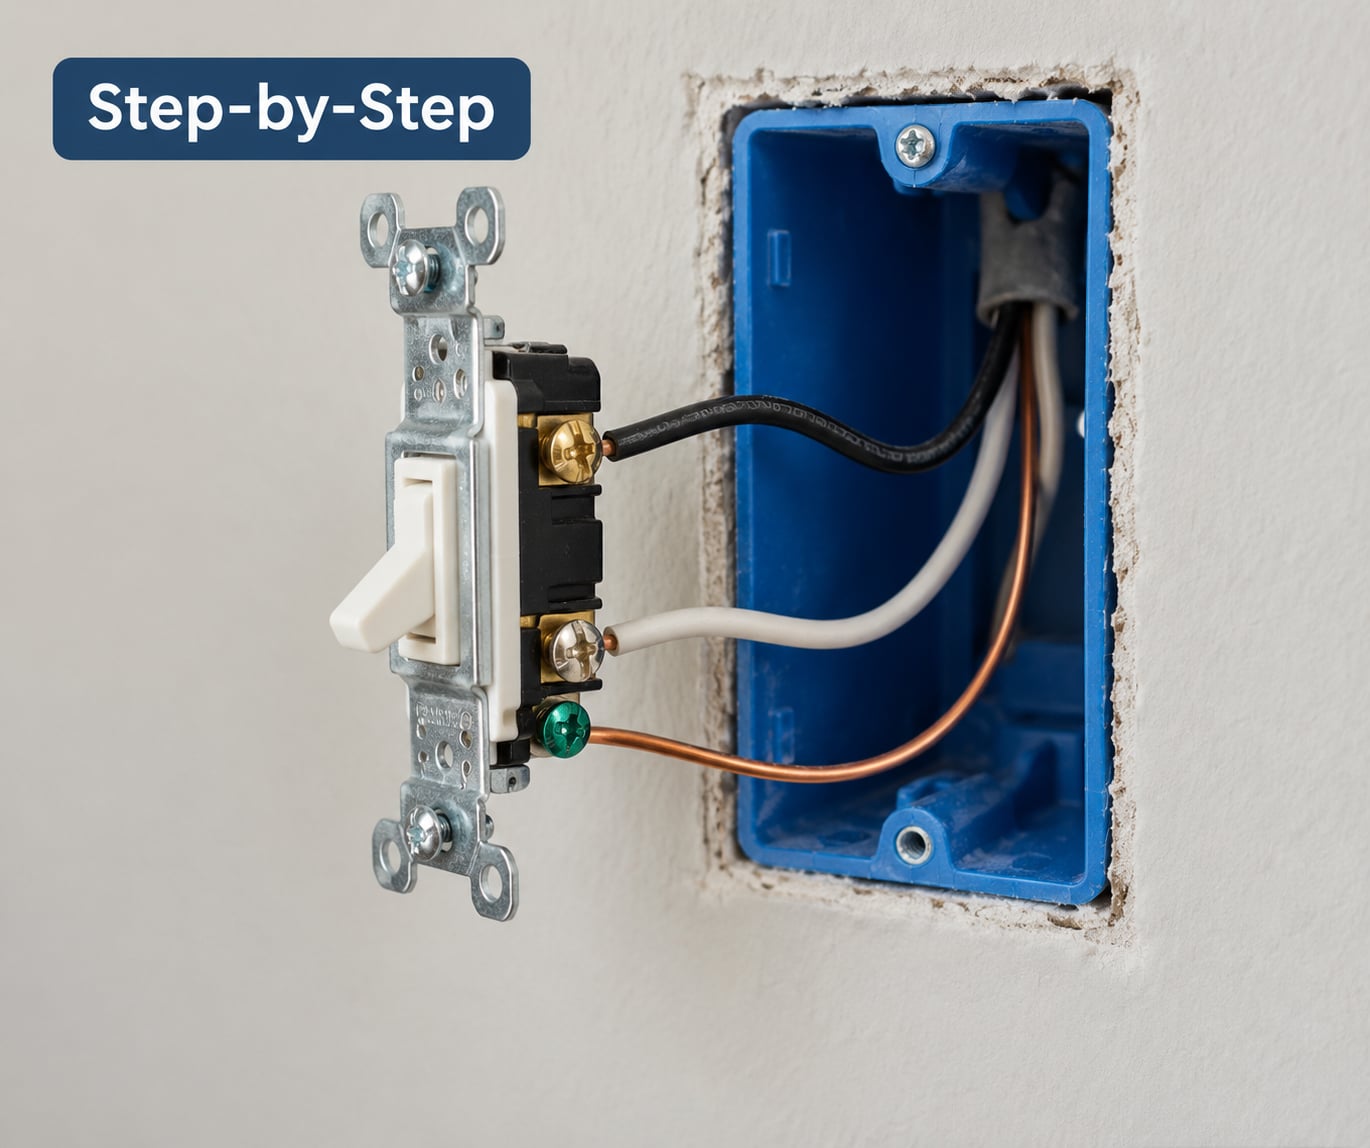
| Line, or hot feed | Black, sometimes red | Carries current from the breaker to the switch | Common screw, usually black, or into the line screw |
| Load, or switched leg | Black, sometimes red | Carries current onward to the fixture when the switch is on | Brass or red screw |
| Neutral | White or gray | Returns current to the panel; it is not switched | Usually not connected to a single-pole switch, but kept in the box and capped if present |
| Ground | Bare copper, green, or green with yellow | Safety path that clears the breaker during a fault | Green grounding screw, pigtailed to the metal box |
Two blacks on a single-pole switch is normal, not a mistake. One is the line feed and the other is the load, and both land on the common screw. Beginners assume the extra black is a sign something is wrong, and they end up with a shorted common.
On a three-way switch, the black screw is the common and the two brass screws are the travelers, and it does not matter which traveler goes to which brass screw as long as you wire the new one the same way the old one was. Mark each traveler with a strip of tape and a number before disconnecting them.
Step 5: Disconnect the old switch
Loosen each terminal screw and pull the wire free. If a wire is stuck or was push-connected, do not yank it. Cut it just above the connector and leave enough length to strip fresh copper.
Keep the ground wire attached to the old switch until the new one is ready, so the box stays bonded. When you do remove it, cap the end immediately with a wire nut and wrap it with tape, because a loose ground in a box is a hazard for whoever opens it next.
Step 6: Connect the new switch
- Strip about three quarters of an inch of insulation from each wire, leaving no stray strands.
- Attach the ground first. Wrap the bare or green wire clockwise around the green screw, tighten it, and leave a short pigtail so you can bond the metal box to the switch later.
- Line and load both go on the common screw for a single-pole switch. Fold the bare ends clockwise into a loop so the strands stay put under the screw, then tighten until the copper disappears.
- Loosen the box so the wires are not pinched. Fill in the box to the code volume for the number of conductors and devices, use listed connectors, and leave the conductors room to move without being yanked.
- Hook the box pigtail onto the same green screw. If the box is plastic, the ground stops at the switch.
Strip length matters more than people expect. Too much bare copper and the screw can nick a strand, leaving a dark spot that heats up over time. Too little and the connection comes loose inside the terminal. Three quarters of an inch is the habit to build.
Step 7: Mount the switch and refit the plate
Fold the wires in behind the switch so nothing is squeezed between the switch body and the box edge, then tighten the mounting screws. The plate sits flush against the wall without a gap, and the switch face stays level. If the wall is uneven, shim the low side with a small washer or a strip of cardboard rather than forcing the plate.
Step 8: Restore power and test
Turn the breaker back on with the switch in the off position. Then flip it on. If the light comes on and the switch feels normal, the job is done.
Before you close the box permanently, look inside once more for strands of copper poking out, an uncovered ground, or a connector that looks half on. It costs you ten seconds now and a call to an electrician later.
What changes on a three-way switch
A three-way switch is the same job with one extra wire and more ways to get it wrong. Power comes in on the common terminal, marked with a black screw or the word common, and two travelers carry current to the other switch. The common at one end is connected to the hot feed, and the common at the other end is connected to the fixture.
Replace one switch at a time, and if the other switch later stops working, the travelers are usually swapped. Turn the power off, exchange the two travelers, and test again. The symptom that trips people up is a new switch that works from one end of the hallway and does nothing from the other, which almost always means the common is on the wrong terminal, not a bad switch.
Dimmer and smart switch swaps
A dimmer drops into a single-pole position using the same line, load, and ground arrangement. Two things catch people: dimmers are deeper bodies, so a shallow metal box may not leave room for the wires to fold behind them, and not every dimmer works with every fixture, particularly with LED bulbs that flicker or buzz at the low end. Many modern dimmers are rated for LED loads and say so on the side of the can.
Smart switches are where homeowners hit a wall, and the reason is nearly always the same: the box has no neutral. Traditional switches need only a hot and a ground, so the electrician who wired the house in 1962 never brought a neutral to the switch location. Most smart switches need a neutral at the box to power their electronics.
You have three options. Buy a smart switch rated for a box with no neutral, which keeps power on a tiny amount so the hub stays responsive, or run a neutral yourself, which means opening drywall, fishing wire back to the panel, and a permit in some jurisdictions, or skip the smart switch and use a smart bulb, smart receptacle, or a remote module that sits behind the existing plate. Whichever route you take, confirm the box is grounded first, because most of these devices need a ground.
Old wiring you should not improvise on
Aluminum wiring was widely used in the United States from roughly the mid-1960s to the mid-1970s. It is thinner than copper for the same ampacity, it heats and cools differently, and it oxidizes at every connection. The joints that cause trouble are the ones someone made with the wrong connector decades ago.
If you find aluminum feeding a switch, you have three honest choices: use connectors specifically marked CO/ALR or AL and mark the device as AL, let a licensed electrician re-terminate the connection properly, or plan an aluminum pigtail transition using the correct listed connector while leaving the rest of the aluminum alone. Wrapping aluminum under a screw terminal that is not rated for it is the failure mode that starts fires, so do not improvise it.
A white wire that is being used as a hot, which older installers did to save a nut, is worth knowing about too. Electrical code allows a re-identified white conductor to serve as a hot only when it is marked with black or red tape or paint at both ends. If you find one, the fix is simple but the decision is better made with a pro, especially in a box with several of them.
Common Mistakes
Leaving a neutral unconnected or un-capped
When you pull a single-pole switch out, any white or gray wire in the box just gets left behind. The mistake is leaving that cut end bare. Cap every unused conductor with a wire nut and tape it, or push it into an approved connector. A dangling neutral is exactly the kind of thing that causes a shock months later, when a different person opens the box expecting nothing.
Failing to verify power is off
This is the one that ends in an emergency room. Test each conductor, test to ground, and re-test the tester on a known live circuit so you know it is not lying. A non-contact pen alone is not proof, because shielded cables and bundled conductors can confuse it.
Over-tightening or under-tightening the screws
An under-tightened terminal arcs, heats, and eventually melts the insulation behind the plate. An over-tightened one strips the screw head and can crush the wire so badly that the conductor breaks off later. Tighten until the insulation seats and the bare copper is just covered, then stop.
Mixing up the terminals
On a single-pole switch, both the line and the load go on the common screw. Putting one on the brass screw makes the light stay on when the switch is off, and in some configurations reverses polarity so the fixture hardware stays energized with the switch off. On a three-way switch, misplacing the common is what causes the new switch to work from only one location.
Forgetting the ground or losing the box bond
The green screw is not optional. A switch without a ground has no path for fault current, which defeats the whole purpose of the breaker. And when you reattach the box pigtail, confirm the metal box and the switch are both bonded, because an unbonded metal box is a shock hazard even with everything else done perfectly.
Forgetting to photograph the wiring
Twenty seconds of photos before you disconnect anything saves you from a box full of identical-looking black conductors and no memory of what was where. It is also the evidence you want if something downstream stops working.
Testing with power on
Toggling a switch while watching a bulb tells you the switch is making contact. It tells you nothing about which conductor is live, and it tempts you to reach in with a finger on a screw. Leave the power off until the wiring is done, then test once, properly, at the end.
Stripping too much copper
Long bare ends are the most common amateur move and the most common cause of a warm switch a year later. Cut back to about three quarters of an inch, and after tightening, confirm no bare copper is exposed past the terminal block.
Practical safety habits
Work with one hand when you can, so a shock cannot complete a circuit through your chest. Keep the work light plugged into a different circuit, since you need light more than you need that outlet. Do not work on wiring while standing in water or on a wet floor, and do not work in a metal sink. Wear shoes with soles, and do not touch the panel with anything other than a properly rated insulated tool.
On a 15 and 20 amp residential circuit, the conductors in most switch boxes are 14 or 12 AWG, and the terminal screws are rated for one. When you see two wires under a single screw on a new switch, use the pigtail or the listed two-conductor terminal so both are properly held.
Frequently Asked Questions
Do I need to turn off the electricity before replacing a light switch?
Yes, always. The wall switch does not interrupt power, it only opens the circuit on the hot side, so the line and load conductors stay energized with the switch off. Turn off the breaker feeding that box, then confirm with a two-pole voltage tester that no voltage is present between the screws, between each screw and ground, and between the screw and the metal box before you touch a conductor.
Can I replace a light switch that has no ground wire?
You can replace it mechanically, but you should not leave it that way. A ground gives fault current a safe path to trip the breaker; without one, a damaged hot wire can energize the metal parts of a fixture. Best practice is to run a ground back to the panel, which is wall-opening work. If the box is metal, bonding it to a switch with no ground does not fix the missing protection.
What wire colors connect to a standard single-pole light switch?
On a single-pole switch, black or red conductors land on the common screw, which is the one that controls the light. Bare copper or green goes to the green grounding screw. A white or gray neutral is often present in the box for other devices, but it does not connect to the switch and should be left alone and capped. Old homes sometimes use white as a hot, so verify with a tester.
Can I use a dimmer switch where a regular light switch was installed?
Usually yes. A single-pole dimmer uses the same line, load, and ground connections as a standard switch. Two things to check: the box depth, since dimmer bodies are deeper and need room for the wires, and the load rating, since some dimmers are designed for incandescent only and will flicker or buzz with LED bulbs. In a three-way location you need a dimmer rated for three-way wiring.
Why does the new light switch feel warm or stop working immediately?
A switch that feels warm after a few minutes usually means a loose terminal screw or a wire that is not fully seated, so current is arcing across the joint. Shut off the breaker and recheck every connection. If a brand new switch does nothing at all, confirm the breaker is on, test the switch away from the wall with a continuity tester, and check that line and load are both on the common screw.
When should I call an electrician instead of replacing the switch myself?
Call a licensed electrician if the box contains aluminum wiring, knob-and-tube or cloth-sheathed cable, or has no ground and needs one run. Also stop if you cannot identify the correct breaker, the wiring is brittle, melted, or scorched, the breaker trips again right after you restore power, or the job involves anything inside the panel. Those conditions are faults, not worn parts, and they deserve a professional.
The Takeaway
Start by killing the breaker, then prove the circuit is dead before anything else. Photograph the wiring, match each conductor to the terminal that had it, tighten until the copper disappears, and test once at the end.
Most of a light switch replacement is mechanical. The half hour that matters is the one spent confirming there is no voltage on any conductor, because that single check is what separates a weekend project from a trip to the emergency department.