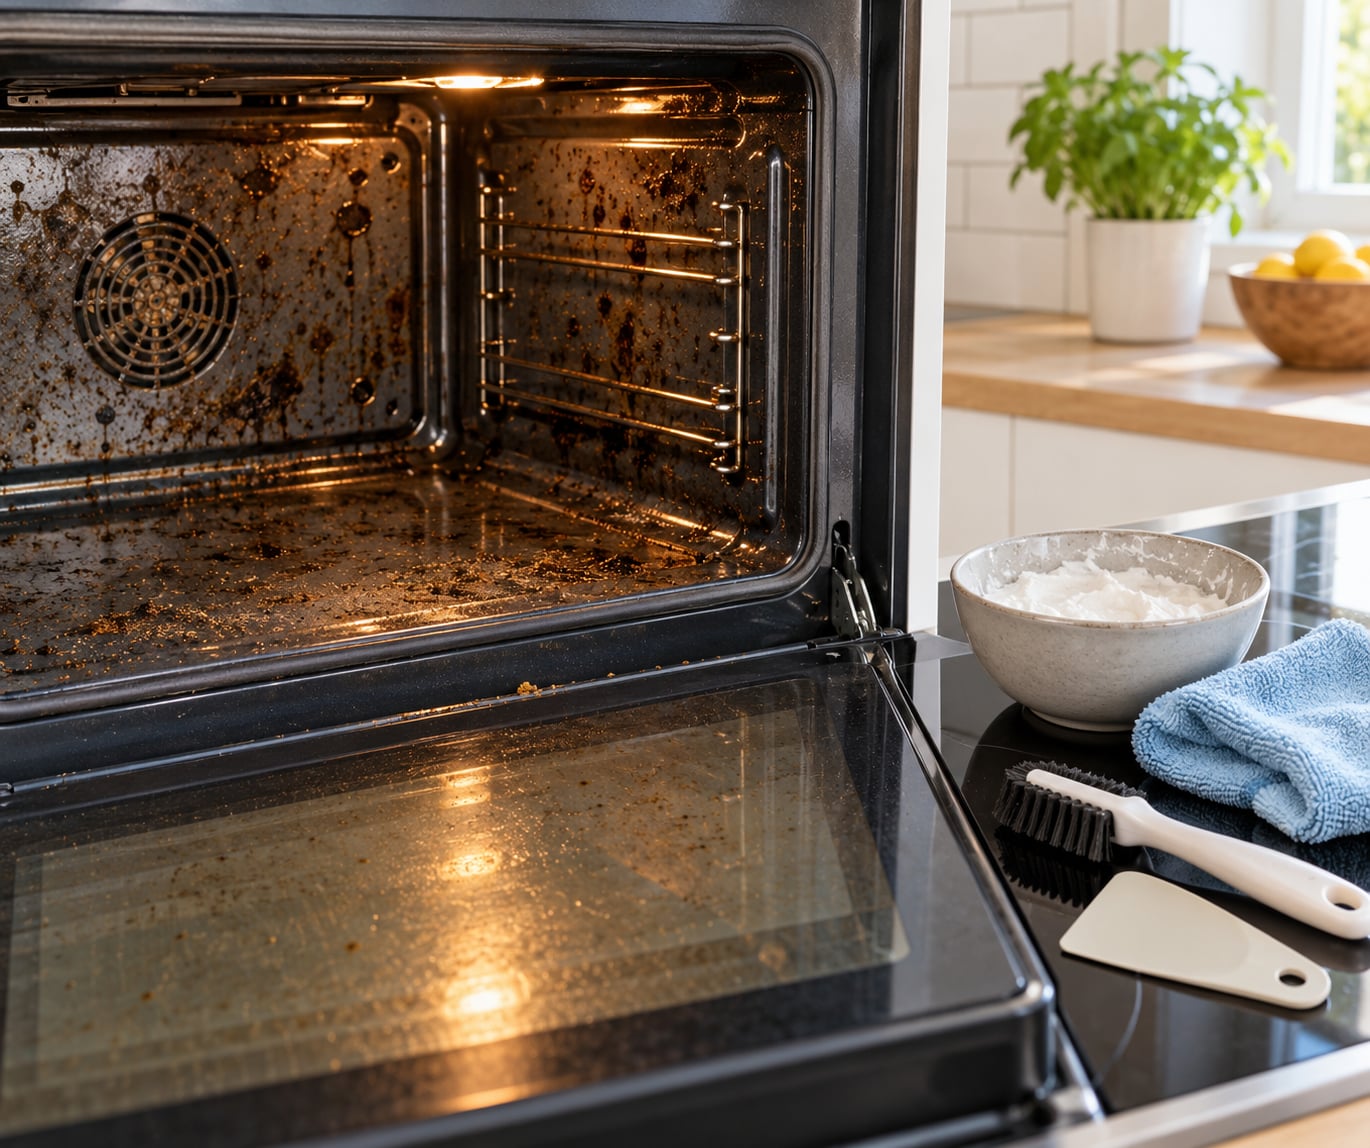
To clean an oven that has baked-on grease, mix 2 tablespoons of baking soda with 3 tablespoons of water, spread the paste thickly over the greasy surfaces, let it sit for 20 minutes, then wipe it away with a damp cloth. Add a small squirt of dish soap for a heavier layer.
That is the whole method, and it costs pennies. Hands-on time runs about 40 minutes once the oven is cool, and most ovens need one pass. The honest part: a thick layer of carbonised grease that has been building for a year takes two or three passes, plus a hot soapy soak for the racks.
People often reach for vinegar first, which is why they end up disappointed. Vinegar is a mild acid and baked-on grease is carbonised fat and sugar. Acid wets it, it does not dissolve it. Baking soda is mildly alkaline, and its fine crystals act as a gentle abrasive while the paste clings to a vertical wall or an overhead ceiling long enough to do the work.
Before you mix anything, check your owner’s manual. Some ovens have surfaces that no cleaner should touch, and a few have a porcelain enamel cavity that punishes steel wool in a way you will notice for years.
Table of Contents
- 1What You Need
- 2Which method actually works on baked-on grease?
- 3Step-by-Step
- 41. Turn Off and Cool the Oven Completely
- 52. Remove Racks and Protect the Oven Floor
- 63. Mix the Baking Soda Solution
- 74. Spread the Paste Over Baked-On Grease
- 85. Let the Paste Sit Until the Baked-On Grease Loosens
- 96. Scrub Stubborn Spots Gently
- 107. Wipe Away the Grease and Cleaner
- 118. Clean the Door and Exterior
- 129. Dry and Reassemble the Oven
- 13When to Use the Oven’s Self-Cleaning Cycle
- 14Common Mistakes When Cleaning an Oven With Baked-On Grease
- 15Tips for Preventing Grease from Baking On Again
- 16Frequently Asked Questions
- 17Can baking soda remove baked-on grease from an oven?
- 18Is it safe to use vinegar to clean oven grease?
- 19How long does it take to clean an oven with baked-on grease?
- 20Should I use the oven’s self-cleaning cycle for baked-on grease?
- 21How do I remove smoke and sticky residue from the oven?
- 22When should I call an appliance professional instead of cleaning the oven myself?
What You Need
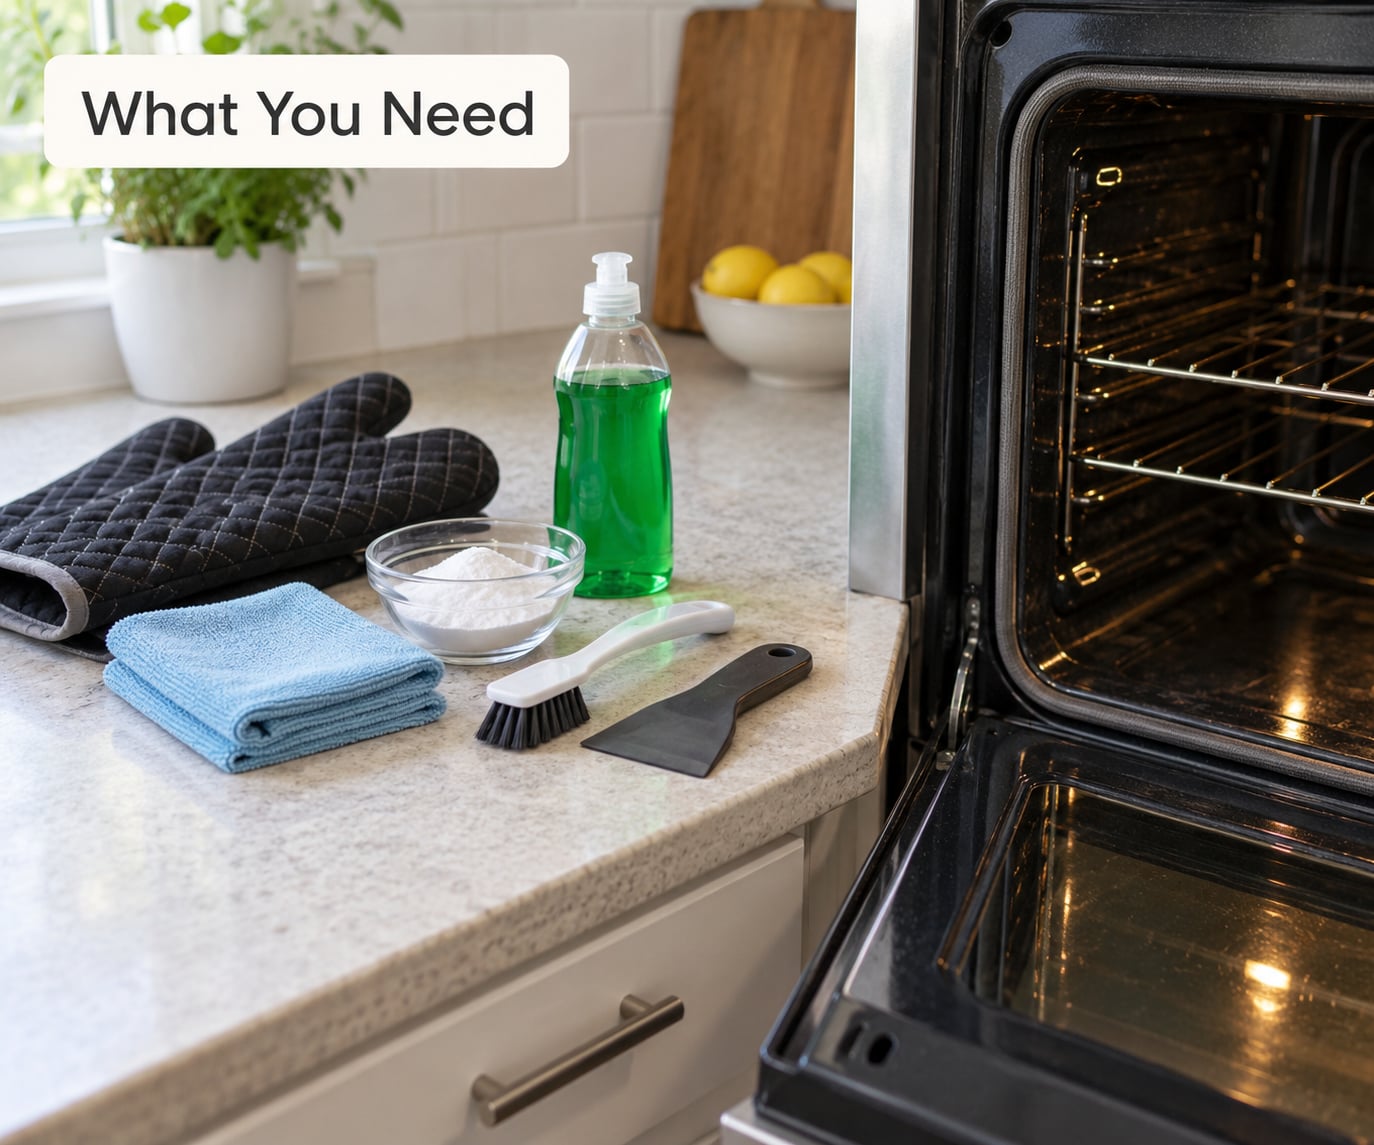
The supply list is short and most of it is already in your kitchen. Anything you buy beyond that is optional.
- Oven-safe gloves — even a fully cool cavity has sharp rack edges and hot-feeling enamel near the door.
- Microfiber cloths — two, one damp for lifting residue, one dry for the haze that follows.
- Baking soda — plain, not baking powder.
- Dish soap — a degreasing kind cuts through what baking soda only loosens.
- A small nylon brush or pastry brush — for the gap between rack rails and the seams at the back.
- A flat plastic scraper or a wooden spatula — for a hardened edge you cannot scrub yet. No metal blade on glass or enamel.
- A spray bottle of water — to dampen cloths, never to spray the oven itself.
- A foil or baking-dish shield — to lay under the heating element area so paste does not bake onto parts you cannot reach.
Check each item against your oven’s manual before you start, because some manufacturers mark areas that stay bare and some restrict what racks can go through the dishwasher.
Which method actually works on baked-on grease?
Four approaches get recommended constantly. They are not interchangeable, and picking the wrong one wastes an evening.
| Method | Time | Effort | Best for | Watch out for |
|---|---|---|---|---|
| Baking soda paste | 20 minute dwell, up to overnight for heavy soil | Low | Grease films, spatters, sidewalls, ceiling | Leaves a chalky haze that needs a second dry pass |
| Self-cleaning cycle | One to three hours at very high heat | Very low | Thin carbon haze on the cavity | Weak on greasy build-up, can leave a film, odour while it runs |
| Commercial oven cleaner gel | 15 to 30 minutes on the label | Medium | Stubborn burnt-on patches | Requires ventilation, gloves, and a full rinse to avoid residue |
| Steam burst | 15 minutes of boiling water in a dish | Low | Softening a thick layer before scrubbing | Water under the door seal can drip onto the floor |
One useful bit of physics while you are here: a self-cleaning cycle pyrolyses carbon, so it does a fine job on grey haze and a poor job on grease film. Readers on home cleaning forums keep asking why their oven still feels slick after a full cycle, and that is the reason.
Step-by-Step
1. Turn Off and Cool the Oven Completely
Switch the oven off at the control panel and cut power at the breaker if your manual tells you to. Then wait until the cavity, the door glass, and the rack rails are cool enough to hold a bare hand for several seconds without flinching.
Check the three places that hold heat longest: the metal around the door opening, the rack rails, and the interior sidewalls near the light. Cleaning a warm oven is how paste gets smeared instead of lifted, and it is a straight burn risk.
Open a window if you plan to use any product with fumes. Keep kids and pets out of the kitchen for the rest of the job.
2. Remove Racks and Protect the Oven Floor
Slide the racks out one at a time and note how they sit — the notch position matters when you put them back. Check the manual for dishwasher rules, because a coated rack put through a hot cycle can come out dull, rusted at the joints, or warped.
Lay a sheet of foil or a shallow oven-safe dish beneath the lower heating element. It costs nothing and it saves you from chiselling baked paste off a part you cannot easily scrub.
Find out what the manual says about the convection fan cover and the door gasket before you scrub near them. Those two areas get damaged more often by over-enthusiasm than by grease.
3. Mix the Baking Soda Solution
Stir 2 tablespoons of baking soda with 3 tablespoons of water in a small bowl. You want a thick, damp paste that holds its shape when you set the spoon down — thin slurry runs off vertical walls and you lose most of the contact time.
Add a small squeeze of dish soap, about a quarter teaspoon, for a genuinely greasy floor. Stir until the mixture is uniform. Soap supplies the surfactant that lifts grease; the soda supplies the mild abrasion and the staying power.
One thing not to do: stir vinegar in with the baking soda. It fizzes, goes flat, and turns into salty water that runs straight down the wall, which is the single most common reason a homemade paste does nothing. If you want the vinegar reaction, sprinkle soda on the surface first and spritz vinegar over it separately.
4. Spread the Paste Over Baked-On Grease
Use the back of a spoon or a spreader to lay a thick, even coat over every greasy surface you can reach: the sidewalls, the back panel, the ceiling above the element, the inside of the door, and the window frame on the outside of the glass.
Do not touch the heating element, the fan cover, wiring, vents, or any area the manual marks as no-clean. If you cannot reach a patch without climbing over the element, leave it for the steam or self-clean pass.
You know the coverage is right when you cannot see oven finish through the paste from a foot away. Thin spots are the spots that survive.
5. Let the Paste Sit Until the Baked-On Grease Loosens
Wait at least 20 minutes with the door closed so nothing dries out. For a lightly greasy oven, that is enough. For a heavy layer, leave it for a couple of hours, or overnight if the oven manual allows and you will re-wet the paste before scrubbing.
The signal that it worked is simple: drag a cloth lightly across the paste. If it lifts away in soft clumps instead of fighting you, the grease has let go. If it smears like wet paint, give it more time, add a second layer, or move to the steam burst in step 6.
6. Scrub Stubborn Spots Gently
Use the nylon brush, the scrubby side of a sponge, or a damp microfiber cloth. Work in small circles with light pressure — you are loosening a film, not sanding enamel.
For a hardened lump, let the flat plastic scraper do the work at a shallow angle. Never use steel wool, a scouring pad, or a razor blade on the cavity or the door glass, even if the glass looks like a bottomless grease pit.
If the paste only softened things, put a shallow oven-safe dish of just-boiled water on the oven floor, close the door, and wait 15 minutes. The steam does to grease what the paste could not, then you scrub again. Pour the water out before it cools into a second mess.
7. Wipe Away the Grease and Cleaner
Take a clean microfiber cloth, dampen it with plain water, and wring it until it is barely damp. Wipe from the back of the cavity toward the door so you are moving toward yourself rather than into the mess.
Fold the cloth to a clean face often. A cloth loaded with grease just spreads it. Follow with a second damp cloth, then a dry one.
The baking soda haze that everyone complains about goes in that final dry pass, or with a cloth barely dampened with white vinegar for the stubborn film. Rinse vinegar cloths separately so you never smell baked cheese next week.
Narrow gaps and the seams where the sidewall meets the back panel are where the film hides. Use the corner of the cloth, a dry toothbrush, or a damp silicone-tipped tool, and keep water out of the vent slots and the door seal.
8. Clean the Door and Exterior
The door glass is its own problem, because grease bakes onto the inside of the pane while heat comes through from both sides. Start on the cool oven with a damp microfiber cloth and a drop of dish soap, then move to the paste if a film remains.
Never spray glass cleaner on the inside of the door. It runs down the pane, seeps past the seal, and pools where the burners or elements are.
Wipe the inner door glass, the frame, the door edge, and the handle with a lightly damp cloth. Then the control panel and exterior: damp cloth for the enamel and stainless trim, nothing wet near the knobs, buttons, or the trim strip along the top where moisture wicks inside.
Cloudiness or a metallic sheen on glass that has been baked-on for years usually means the glass has etched, and etching is permanent. Get it as thin as you can and stop there rather than chasing it.
9. Dry and Reassemble the Oven
Leave the door open and the cavity empty for an hour or two. Any trapped moisture steams the next time you heat the oven and leaves a fresh haze on the glass.
While it dries, wash the racks. Soak them in the hottest tap water with a squirt of dish soap for 20 minutes, scrub with a nylon brush or the scrubby side of a sponge, rinse, and dry completely before they go back in. Wet racks spot with rust.
Pull out the foil shield, check for a chalky film or a greasy patch you missed, then slide the racks back into the notches you noted earlier. Refill the drip pan and crumb tray, and put the oven back on power.
Do a wipe with a dry cloth after your next bake. Grease that is still slightly tacky is far easier to remove than grease that has set for a month.
When to Use the Oven’s Self-Cleaning Cycle
Use the self-cleaning cycle only if the manual recommends it, and treat it as a finishing step rather than the main one. It burns off carbon haze at very high heat, which is genuinely useful after a spatter disaster, but it does very little to greasy film — the most common complaint on cleaning forums is a still-slick oven after a full cycle.
Before you start: take out every rack, tray, foil, and liner, including things pushed to the back you may have forgotten. Wipe up grease pooled in the cavity, because that grease can smoke heavily. Run the range hood or open windows, keep children and pets out of the room, and expect an acrid smell for an hour or two.
The cycle runs for one to three hours and locks the door. It bakes a thin powdery ash that you wipe up with a damp cloth afterward, and it can leave a film that some people need a paste pass to remove. It is also the single most common way to damage a door seal or a coated rack, so keep the schedule in the manual in view.
Common Mistakes When Cleaning an Oven With Baked-On Grease
Almost every ruined oven I have seen came from one of six habits. Each has a simple correction.
Abrasive pads and steel wool. They scratch porcelain enamel and permanently haze door glass. Swap for a nylon brush, a non-abrasive sponge, or a plastic scraper and more dwell time instead of more force.
Spraying liquid into the oven. A spritzed cleaner runs into vents, the door seal, and wiring, and it can leave a powdery residue that attracts new grease. Mix the paste in a bowl and apply it with a spoon.
Cleaning while warm. Paste smears, cleaners flash to vapour, and you risk a burn. Cool the cavity, the rails, and the door frame fully first, even if that takes an hour.
Mixing cleaners in one paste. Baking soda plus vinegar plus dish soap together fizzle into a weak salt solution that does nothing. Use one active ingredient per pass and let each do its job.
Ignoring the manual. Some cavities are coated, some racks are dishwasher-prohibited, and some ovens have a no-clean zone around the fan. Read the care section before the first pass, not after something breaks.
Leaving residue behind. Dry powder that looks harmless turns back into film the first time heat hits it. Finish with a damp cloth and then a genuinely dry one until there is nothing left to buff off.
Tips for Preventing Grease from Baking On Again
Prevention is cheaper than paste and far less satisfying, which is why most of us skip it. A few habits change the job entirely.
Cover food whenever you can. A fitted pan lid, a sheet of foil crimped over a roasting dish, or a splatter screen stops most of what turns into carbon.
Catch drips where they start. A foil liner or a disposable foil tray under the element block turns an hour of baked-on mess into a sheet of foil you throw away — but only if your oven manual allows it, because a tight liner can block airflow or trap heat. When in doubt, a separate sheet pan on the rack is safer than anything glued to the floor.
Wipe splatters while the oven is still warm. A damp cloth on a slightly greasy wall removes what a cooled wall will not. This is the highest-value five seconds in oven care.
Use a roasting pan with a rim for fatty foods. Most overnight grease problems come from one sheet pan sitting too long in a hot oven.
Run a light wipe-down monthly and a full paste pass twice a year. Grease that is six months old takes three passes; grease that is six weeks old takes one wipe.
Frequently Asked Questions
Can baking soda remove baked-on grease from an oven?
Yes, for grease films and spatters, baking soda paste is usually enough. Mix 2 tablespoons of baking soda with 3 tablespoons of water, add a small squeeze of dish soap for heavy grease, spread it thickly, and leave it 20 minutes before wiping. Very old carbonised grease usually needs two passes or an overnight soak. It will not shift etched haze on glass, and it does nothing for grease inside vents.
Is it safe to use vinegar to clean oven grease?
Vinegar is safe to use in a cooled oven, but it is a weak choice for baked-on grease on its own. It wets the surface rather than dissolving carbonised fat, so it mostly dilutes whatever is already loose. A better use is a cloth barely dampened with vinegar for the chalky haze baking soda leaves behind. Never mix vinegar with bleach or with ammonia.
How long does it take to clean an oven with baked-on grease?
Plan on about 40 minutes of hands-on work plus a 20 minute dwell, once the oven is fully cool. Cooling time can add an hour. A year-old layer of carbonised grease usually takes two passes and sometimes an overnight soak, plus a separate soak for the racks. A self-cleaning cycle adds one to three hours and does not remove grease film.
Should I use the oven’s self-cleaning cycle for baked-on grease?
Only if your manual recommends it, and only as a finishing step. The cycle burns off carbon haze at very high heat but leaves greasy film largely intact, which is why ovens can still feel slick afterwards. Remove every rack, tray, and liner first, wipe up pooled grease, ventilate the room, and keep children and pets away for the whole cycle.
How do I remove smoke and sticky residue from the oven?
Sticky residue after a self-cleaning cycle is usually unburned ash mixed with old grease film. Wipe it up with a damp cloth, then run the baking soda paste over any part that still feels tacky and leave it 20 minutes. For smoke smell, wipe the cavity with a vinegar-dampened cloth after the paste stage, leave the door open to air, and run a 350F empty oven for 20 minutes to flush the odour out.
When should I call an appliance professional instead of cleaning the oven myself?
Stop and call a technician when the self-cleaning cycle no longer locks, when there is a burning smell that continues after a clean cycle, when a heating element shows visible damage or a burnt spot, when the door glass is cracked, or when the door seal looks hardened, cracked, or loose. Working around a damaged heating element or seal is an electrical and fire risk, not a cleaning job.
If you remember only one line for how to clean an oven that has baked on grease: start with 2 tablespoons of baking soda and 3 tablespoons of water, plus a small squeeze of dish soap if the oven is properly greasy. Cool it fully, spread the paste thick, wait 20 minutes, then wipe with a damp cloth and finish dry.
Clean the racks in hot soapy water while the paste works, and save the self-cleaning cycle for carbon haze you cannot scrub out. Do that twice a year and the next deep clean takes twenty minutes instead of an afternoon.