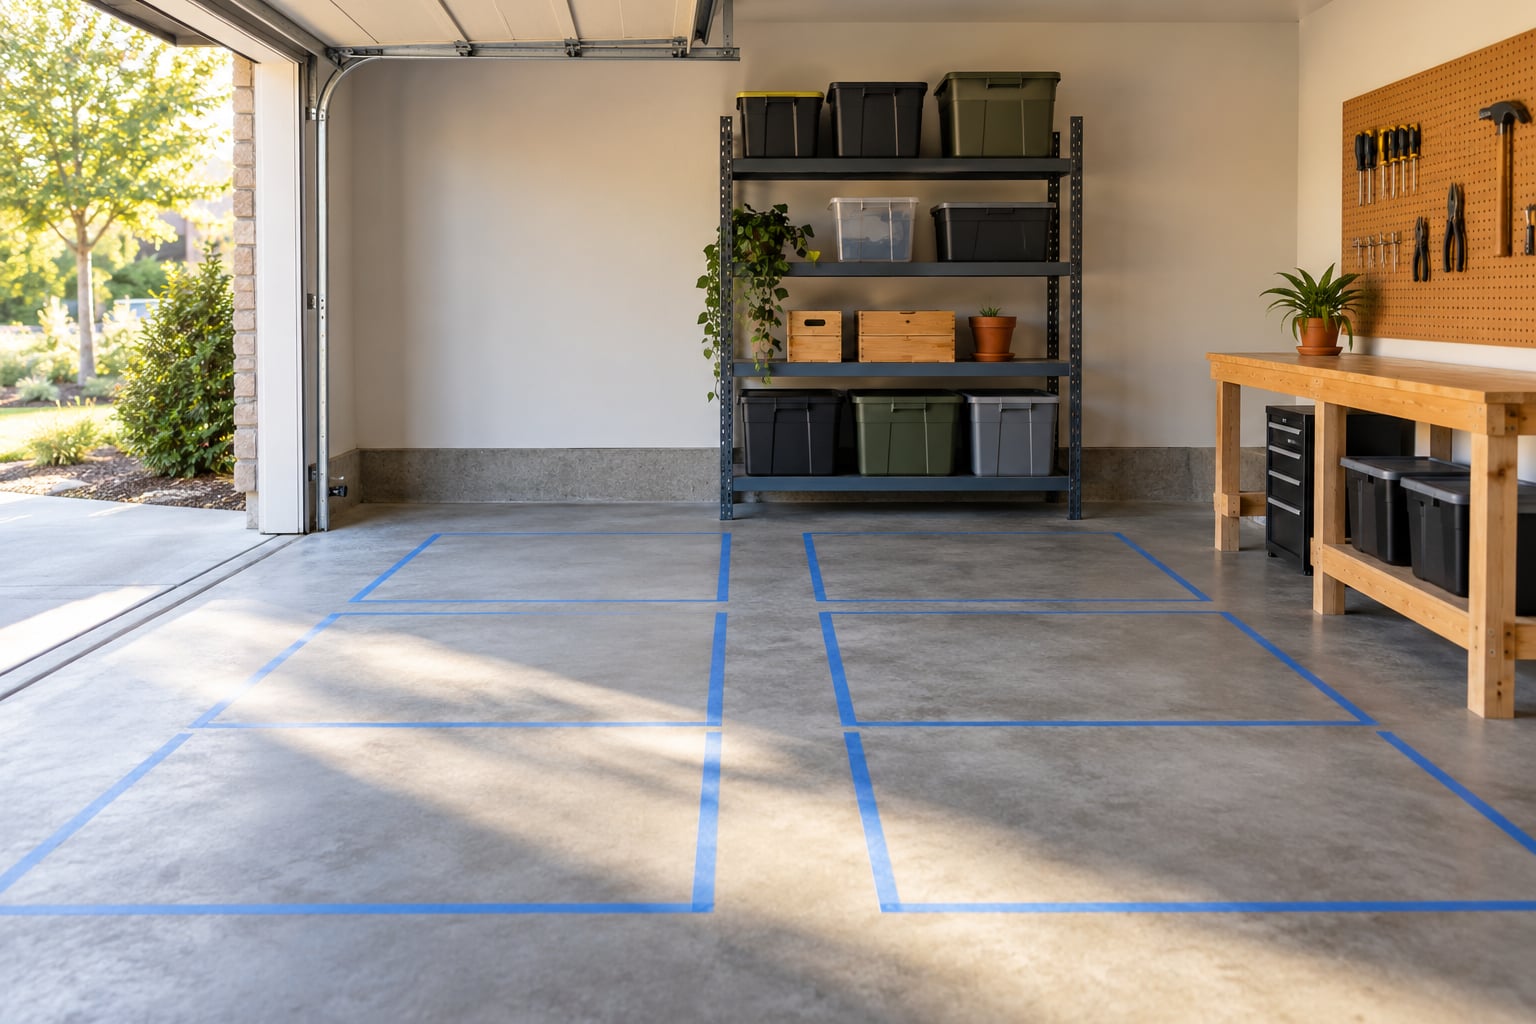
Organizing a garage from scratch means emptying the entire space, sorting every item into keep, donate, sell or discard, measuring the empty room, then buying storage that actually fits before anything goes back in. Budget one long weekend for the empty-out and sort, and a second weekend if shelving or a workbench goes in.
The empty-out is where most people stall. You cannot get the car out, the mower blocks the door, and the whole thing feels too big to start. Fix that by treating the garage as a staging zone instead of a storage problem: pull everything onto driveway tarps, sort it into five labelled stations, and the room becomes a blank floor plan you can actually measure.
Done properly, a garage reset is less about buying bins than about cutting the pile down to what you actually use. The sort usually removes more than people expect, and that removed volume is exactly what makes the shelving plan work.
Table of Contents
- 1What You Need to Organize a Garage From Scratch
- 2Pick a weather window before you start
- 3The 5-Step Garage Reset: How to Organize a Garage From Scratch
- 4Step 1: Empty the garage completely
- 5Step 2: Sort and triage every item
- 6Step 3: Measure and map the empty space
- 7Step 4: Plan your zones and install storage that fits
- 8Step 5: Label everything and put it back
- 9How to Sort a Garage Full of Everything
- 10The relocation trap nobody warns you about
- 11Guilt is not a reason to keep something
- 12How to Plan Your Garage Layout and Zones
- 13Six zones cover almost every garage
- 14Sample layouts for three common garages
- 15Use the vertical space before you add floor space
- 16Safe reach and weight rules
- 17What Storage to Use for Each Item Type
- 18Small parts deserve their own system
- 19What Should Not Be Stored in a Garage
- 20Garage Organization on a Budget: Three Cost Tiers
- 21Tier one: DIY and free
- 22Tier two: mid-range ready-made
- 23Tier three: custom and installed
- 24Floor options compared
- 25Common Mistakes That Ruin a Garage Reset
- 26How to Keep Your Garage Organized After the Reset
- 27Give every item one home and one label
- 28Build a maintenance rhythm
- 29Keep an inventory of manuals
- 30Frequently Asked Questions
- 31How do I organize my garage full of everything?
- 32What are the 5 steps to organize a garage?
- 33What should not be stored in a garage?
- 34How should I layout my garage?
- 35How long does it take to organize a garage from scratch?
- 36How do I keep my garage organized after cleaning it?
- 37Where to Start Tomorrow Morning
What You Need to Organize a Garage From Scratch
The gear list is short, and most of it you already own somewhere in the garage you are about to empty.
- A staging surface. Painter’s plastic, a tarp, or a few sheets of plywood on the driveway. Grass gets wet and mud tracks into the house.
- A parking plan for the car. Street, driveway of a neighbour, or a carport. Decide this before day one, not on Saturday morning at 8am.
- Five sorting stations. Masking tape and a marker on the driveway, or five yard signs, labelled keep, donate, sell, discard, move indoors.
- Moving containers. Boxes, bags, a wheelbarrow or hand truck, and trash bags for the discard pile.
- Measuring tools. Tape measure, painter’s tape for marking the floor plan, a notebook or phone for notes.
- Labelling supplies. A marker, a label maker if you own one, and clear tape for masking tape.
- Safety basics. Nitrile gloves, a dust mask, eye protection, a flashlight, and a step ladder you trust.
Pick a weather window before you start
Freezing or wet weather ruins a sort. Nobody enjoys sorting garden stakes in the rain, and damp cardboard becomes a mold problem you will deal with twice. Check the forecast for three dry days, and if the date is tight, stage half the garage indoors and swap halfway through.
The 5-Step Garage Reset: How to Organize a Garage From Scratch
These five steps run in order, and the order matters. Sorting before you buy is the difference between a system that fits your garage and a garage full of shelves you cannot use.
| Step | Rough time | What it produces |
|---|---|---|
| 1. Empty the space | 4 to 6 hours | A clean, empty room and a driveway full of sorted piles |
| 2. Sort and triage | 4 to 8 hours | Keep, donate, sell, discard and move-indoors piles |
| 3. Measure and map | 1 to 2 hours | A floor sketch with wall lengths, door swing and ceiling height |
| 4. Plan zones and install storage | 1 to 2 weekends | Shelves, pegboard, cabinets and racks matched to the sketch |
| 5. Label and return | 3 to 5 hours | Every item in its zone with a readable label |
Step 1: Empty the garage completely
Everything comes out, including the things shoved behind the car that nobody has looked at since the last move. Vacuum or sweep the floor once it is bare, and check for moisture, cracks or oil spots you had hidden. A stain found now is a Saturday project; a stain found after the shelves go in is a whole weekend.
Step 2: Sort and triage every item
Work pile by pile and item by item. A pile you judge as a whole is how three mystery boxes survive for another five years. Use the five stations and give yourself permission to be ruthless: the volume you remove here is the volume you do not have to buy storage for later.
Step 3: Measure and map the empty space
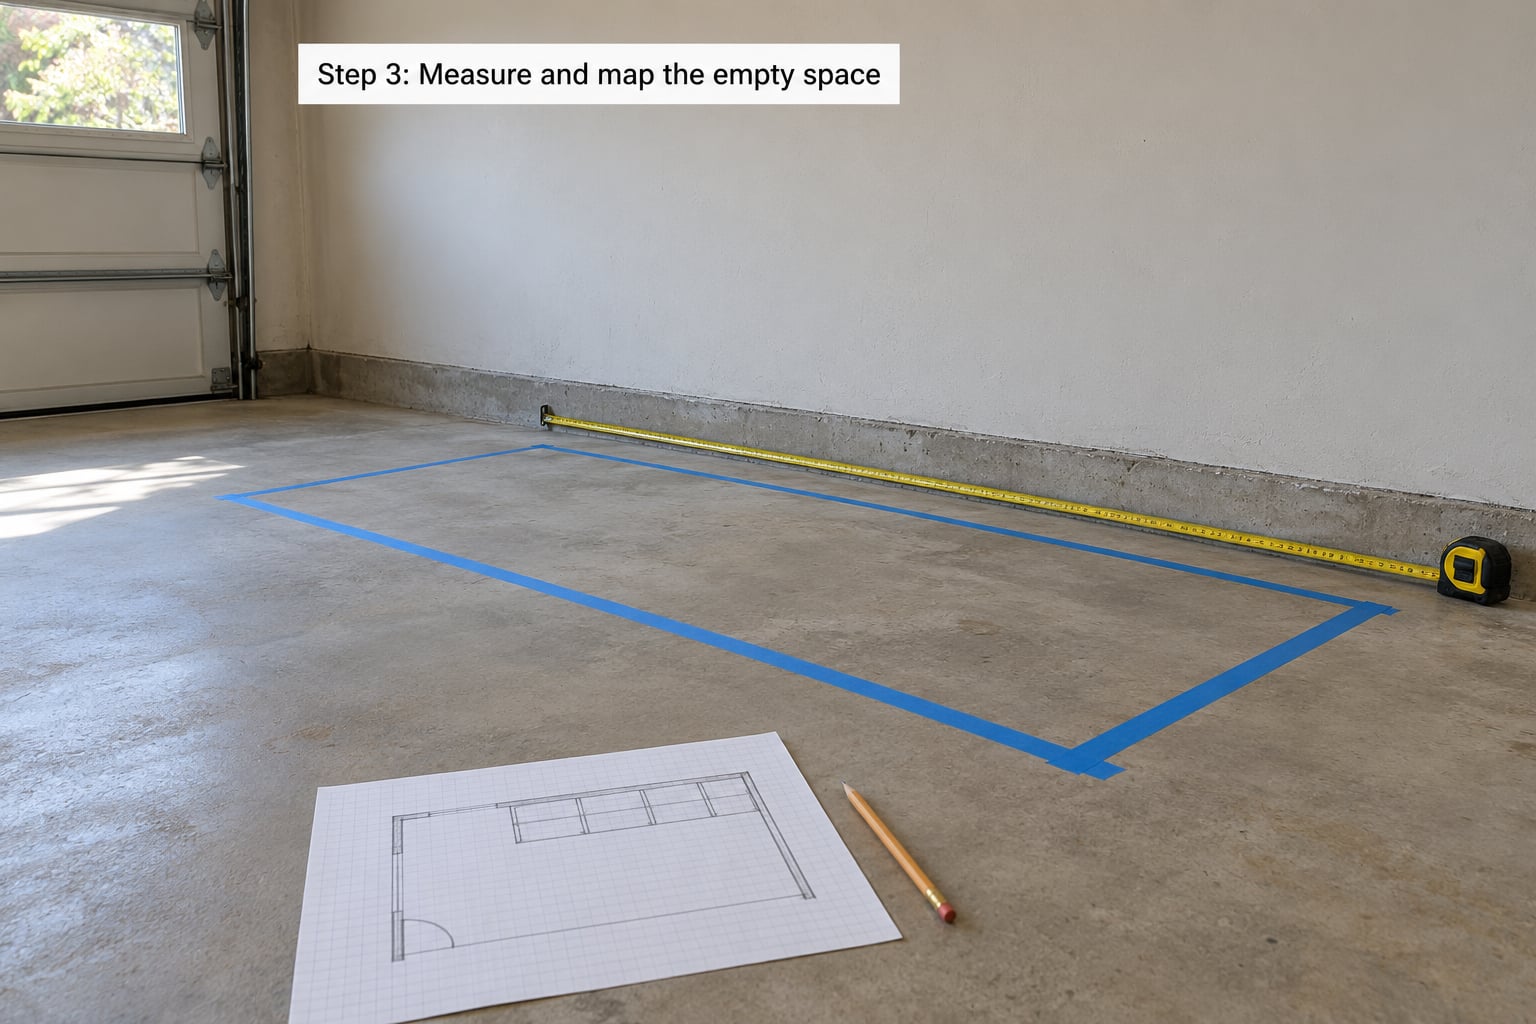
Now take the tape out. Record wall lengths, ceiling height, the width and height of the garage door and its swing path, the location of the electrical panel and any windows or outlets. Sketch it on paper, roughly to scale, and mark the door swing.
Step 4: Plan your zones and install storage that fits
Divide the floor plan into zones, then buy storage against the numbers you just wrote down. A 6-foot-tall steel shelving unit that is 44 inches wide needs 48 inches of clear wall and a door swing that misses it. Measure the unit in the store, then measure the wall at home again before you cut drywall or commit to an anchor.
Step 5: Label everything and put it back
Return items heaviest and most-used first. Label the front of every bin, shelf and drawer before it goes back, not after, because you will not remember which of four identical boxes holds the Christmas lights. Then walk the whole room and put a broom against every wall to catch the trip hazards.
How to Sort a Garage Full of Everything
Sort by the 12-month test: if you have not touched it in the last year, it is not part of your life. Seasonal gear is the exception, and only if it earns a spot twice a year rather than once every three years.
| What you are holding | Decision | Where it goes |
|---|---|---|
| Used in the last year | Keep | A labelled home in a zone |
| Used once or twice a year, seasonal | Keep, high or low by weight | Overhead rack or top shelf if light, floor if heavy |
| Unused a year, works fine | Donate or sell | Out of the garage within seven days |
| Duplicate of something you own | Discard or donate one | Only the better one stays |
| Belonged to someone else in the house | Move indoors or donate | Its rightful room, if it has one |
| Broken, rusted, dry-rotted | Discard | Scrap or recycling, whichever the local rules require |
The relocation trap nobody warns you about
Moving a pile to the attic, a closet or the basement does not reduce your possessions, it hides them and creates a second problem. Before you shift anything indoors, ask whether that room already has a job for the item. If the answer is no, the item is clutter in a slower lane.
Guilt is not a reason to keep something
Sentiment and storage are different categories. Photograph the thing, give it a week, then let it go. The stack of half-finished projects you never start is the biggest space thief in most garages, and it does not get smaller if you keep moving it around.
How to Plan Your Garage Layout and Zones
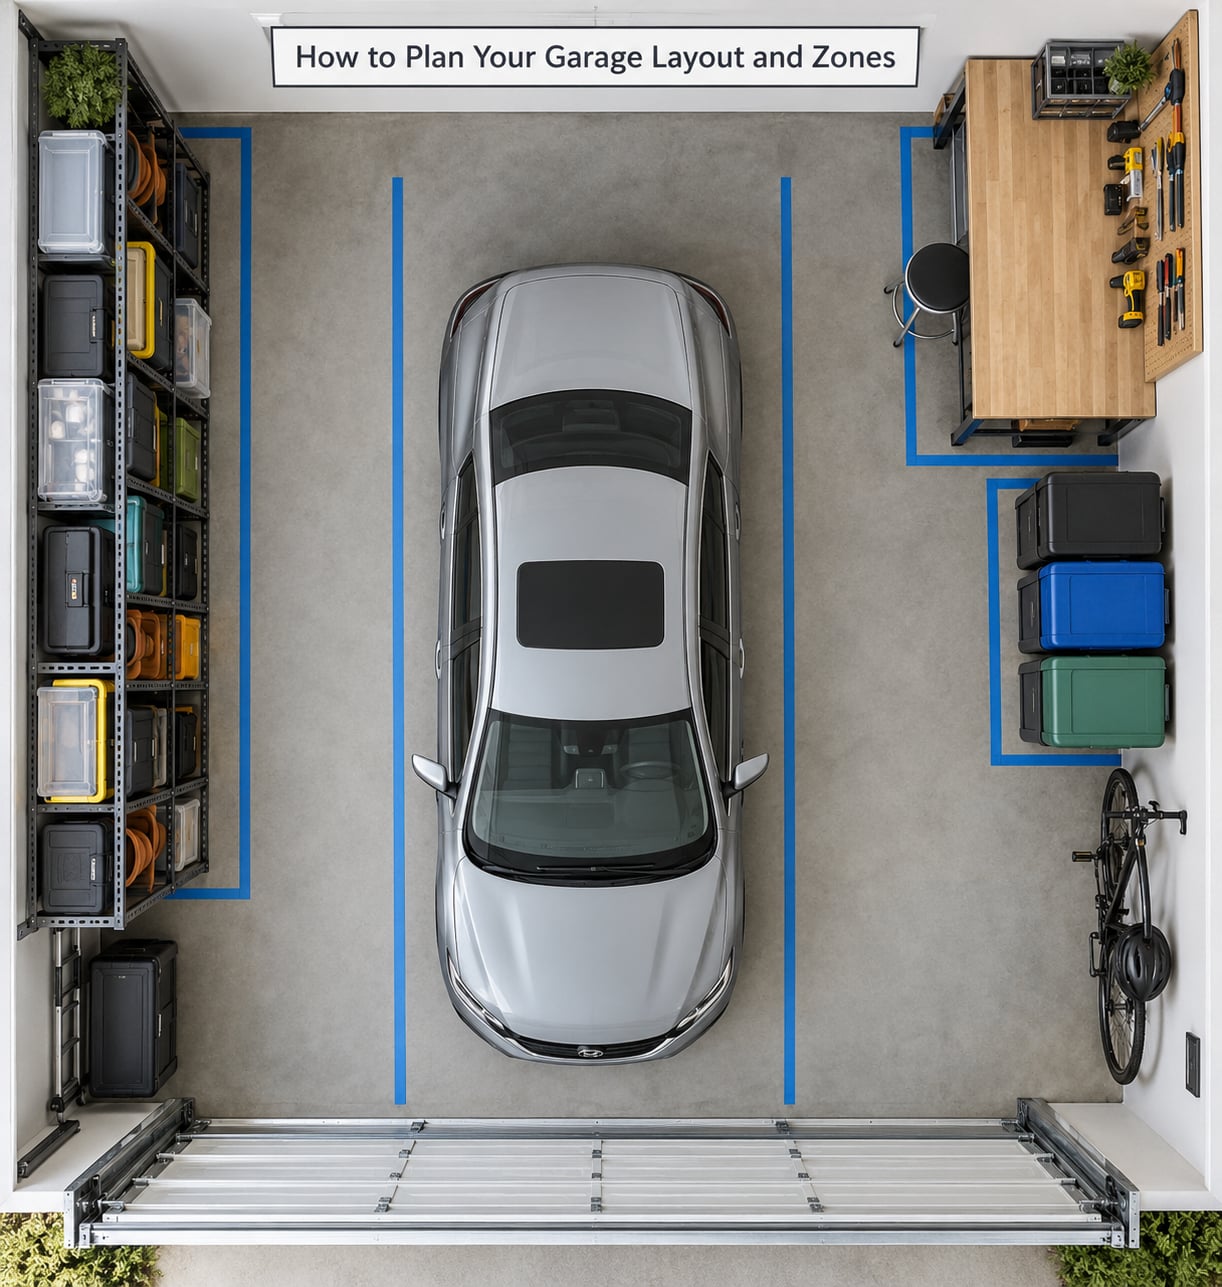
Plan from the door outward. The first requirement is a clear path from the entry to the car door and to the electrical panel, and that path stays clear forever.
Six zones cover almost every garage
- Daily tools. Hand tools and the tool chest at chest height near the door, so you grab them without walking the length of the garage.
- Power tools and hardware. Pegboard or slatwall on the wall you see first, with a drawer cabinet for screws, nails and bits.
- Workbench zone. One corner with a bench, task lighting and a rolling cart that pulls out when you work and back when you park.
- Vehicle maintenance. Jack, jack stands, oil, filters, antifreeze, wiper fluid, tire kit and spare tires, stored low and close to the wall.
- Lawn and garden. Mower and wheelbarrow on the floor, hand tools on wall hooks, pots stacked near the door to the side yard.
- Seasonal and overflow. Clear lidded bins on shelving or the overhead rack, stacked by weight with the lightest on top.
Sample layouts for three common garages
One-car garage, roughly 12 by 20 feet. Run 18 to 24 inches of shelving along the back wall, 12 inches deep, and a workbench along the side wall. Bikes hang on ceiling hooks above the workbench corner, and seasonal bins go on an overhead rack over the car, positioned so you can load them without pulling the car out.
Two-car garage, roughly 20 by 22 feet. Keep the middle aisle and both car doors clear. Storage goes on the two side walls and the back wall, no more than 18 inches deep so the doors still open wide. Overhead racks above each parking bay handle the bulky, rarely used stuff.
Single bay with a workshop. Give the workshop a defined 4-foot by 8-foot corner with a bench along the wall and a pegboard above it. Everything else earns shelf space on the opposite wall. A pegboard over the bench beats a shelf because the tools stay visible.
Use the vertical space before you add floor space
Most garages use about a third of their usable volume. Shelving takes items off the floor and multiplies capacity; pegboard and slatwall take hand tools off the bench; ceiling hooks handle bikes, ladders and seasonal gear; and overhead racks above the garage door, which forum regulars call the single best upgrade, take the bulky seasonal bins completely out of sight.
The garage door itself is usable too. Track-mounted organizers and baskets hang from the ceiling-mounted rails and hold sponges, gloves, shovels and Christmas wrap without stealing floor space.
Safe reach and weight rules
Heavy things go low, between knee and shoulder height, and never overhead where a falling bin hurts someone. Light but awkward items, like camping tents and sleeping bags, can go high since they weigh little. Anything above about shoulder height needs a step ladder, and if climbing is hard on your knees or back, that stuff should not live above six feet at all.
Anchor shelving to studs, not drywall. Check the load rating on a rack, and spread heavy items across two units rather than stacking them all on one. Keep at least 12 inches of clearance in front of shelving so you can pull a bin out without shuffling neighbours aside.
What Storage to Use for Each Item Type
Match the container to the item. The wrong container is why people re-sort the same bin every year.
| Item type | Best container | Best location |
|---|---|---|
| Hand tools | Tool chest or wall hooks with a shadow board | Chest height near the door |
| Power tools | Hard cases, stacked on shelving | Mid-height wall shelving |
| Screws, nails, bits | Clear jars or drawer organizers, labelled | Drawer cabinet at the workbench |
| Small hardware and cords | Bins with lids, one per project type | Bench shelf, within arm’s reach |
| Lawn and garden tools | Wall hooks and a garden tool rack | Side wall, away from the car |
| Seasonal decorations | Clear lidded totes | Overhead rack or top shelf |
| Car fluids and parts | Sealed containers on a low shelf | Bottom shelf, back wall |
| Bikes and sports gear | Ceiling hooks, wall-mounted rack | Ceiling or side wall |
| Paint and brushes | A repurposed shoe rack, one pocket per brush | Along a side wall, off the floor |
| Bulk paper and packaging | Bins, not bags, stacked flat | Any shelf, kept dry |
Small parts deserve their own system
Hardware is where garage organisation usually falls apart. Sorted by size or by type instead of by task, you will dig through four mixed bins mid-project. Pick one convention and stick to it, then use clear jars for loose screws and a magnetic strip for drill bits and small blades. Labels on three faces of every tote, long side, short side and lid, keep a stack readable.
What Should Not Be Stored in a Garage
Most garages are unheated, uninsulated spaces that swing from freezing to well over 100 degrees. Some items are a fire or health risk there, and some simply get ruined.
| Item | Why it does not belong | Where it should go |
|---|---|---|
| Propane cylinders | Stored above freezing they can vent; any leak in an enclosed space is serious | Outside, upright, away from openings |
| Gasoline and fuel cans | Flammable vapour and vapour pressure in a hot space | Approved metal cabinet outside or in a shed |
| Charcoal, lighter fluid, solvents, aerosol sprays | Flammable, and heat makes some pressurised cans dangerous | Shed or garage cabinet rated for flammables |
| Pool chlorine and pool chemicals | Heat and moisture degrade them; chlorine near other chemicals is risky | Dry, shaded, off the concrete |
| Lithium batteries and power banks | Heat and a half-charged battery are a fire risk | Cool indoor shelf at about half charge |
| Food, pet food and birdseed | Attracts rodents, insects and larger pests | House or sealed metal bin outdoors |
| Cardboard boxes and paper | Rodents chew through them fast | Sealed plastic bins with gasketed lids |
| Paint, adhesives and glue | Freezing ruins latex paint, and heat softens adhesives | Climate-controlled closet or shed |
| Dry ice | Releases carbon dioxide, which settles in a low enclosed space | Never indoors; ventilated outdoor use only |
| Fireworks and matches | Fire risk in an attached structure | Away from the house entirely |
One more category gets overlooked: anything a fire would feed on fast. Cardboard, paper and fabrics belong in bins with latching lids, not stacked next to a workbench with a grinder.
Garage Organization on a Budget: Three Cost Tiers
Prices vary by region and change over time, so treat these as shapes rather than quotes. Pick the tier that matches how much wall space you actually have.
Tier one: DIY and free
Everything comes from what you are removing. Cardboard boxes become drawer dividers, empty jars hold hardware, a kitchen magnetic strip holds drill bits, and mismatched shelving becomes one zone rather than a scattered collection. Cost is limited to a marker, tape and a couple of sturdy shelves. This tier works best for a small garage or a first pass.
Tier two: mid-range ready-made
One tall steel shelving unit per wall, a pegboard panel over the workbench, a stack of clear lidded totes, a rolling cart and a label maker. This is the setup most people end up with, and it covers the vast majority of garages. Buy shelving in a single consistent size so bins line up and the room looks deliberate.
Tier three: custom and installed
Cabinets, slatwall, a workbench with drawers and a professional install. Worth it when the garage is a working shop you use daily, or when a wall is oddly shaped and off-the-shelf units will not fit. Worth skipping when the garage mostly holds seasonal bins.
Floor options compared
A bare concrete floor collects oil and dust and shows every crack. A sealer is the cheapest fix and gives the floor a cleanable surface. Interlocking tiles are modular, forgiving of a slightly uneven slab and easy to lift when you move. Epoxy coating looks the best and lasts the longest, but it needs a clean, dry slab and a few days of curing with the door open. Whichever you pick, put a mat under the car and a drop cloth under the workbench.
Common Mistakes That Ruin a Garage Reset
- Buying bins before sorting. You end up with a stack of empty containers and a garage still full. Sorting first tells you how many containers you actually need.
- Storing heavy items overhead. Lifting a 40-pound bin onto a top shelf is how backs get hurt and bins get dropped. Weight decides height.
- Mixing zones. Garden tools on the same shelf as Christmas decorations means one of them never gets put back.
- Skipping labels. Unlabelled totes drift out of use within a year. Label on three faces so a label reads when the tote is stacked.
- Ignoring the door swing and car clearance. Shelving that blocks the door or stops the car from opening fully gets removed within a month.
- Forgetting the floor plan. Six weeks of organizing, then shelving that does not fit the wall. Two hours of measuring prevents that.
How to Keep Your Garage Organized After the Reset
The reset is the easy part. Most garages drift back to chaos within a year for three reasons: there is no rule for new items, no exit path for leftovers, and no maintenance rhythm.
Give every item one home and one label
When something new comes in, it goes on a labelled shelf in an existing zone or it does not come in. A donate bin by the door is the most useful single object in an organized garage, because leftovers leave within a week instead of drifting back onto a shelf.
Build a maintenance rhythm
Five minutes every Sunday returning things to their zone prevents a two-day reset. Once a season, swap the current season’s bins down and put the next season’s up, which keeps heavy items from living permanently at eye height. Once a year, walk the space with the 12-month test again and clear out what stopped being used.
Keep an inventory of manuals
A photo of the model and serial number for every appliance, mower and power tool, kept in one notebook or a phone note, saves hunting for paperwork while a machine is already apart. It takes twenty minutes once and pays for itself the first time a warranty question comes up.
Frequently Asked Questions
How do I organize my garage full of everything?
Start by removing everything, including what is stacked behind the car, and set up five stations on the driveway: keep, donate, sell, discard and move indoors. Sort item by item rather than pile by pile, since a pile you judge as a whole always survives. The 12-month test settles most arguments: untouched for a year means donate, sell or discard, unless it is genuinely seasonal.
What are the 5 steps to organize a garage?
Empty the space completely, sort every item into keep, donate, sell or discard, measure and map the empty room, plan zones and install storage that fits those measurements, then label everything and put it back in its zone. Sorting before buying is the step people skip, and it is the one that stops you buying racks and bins you never needed.
What should not be stored in a garage?
Skip propane cylinders, gasoline cans, charcoal, aerosol sprays, solvents, pool chemicals, dry ice and fireworks. Most garages swing from freezing to well over 100 degrees, which ruins latex paint, adhesives and batteries. Food, pet food and cardboard attract rodents. Store these in a climate-controlled room, a shed or a cabinet rated for flammables.
How should I layout my garage?
Plan from the door outward and keep a clear path to the car door and the electrical panel. Put daily tools near the door at chest height, heavy items low along a wall, and rarely used seasonal bins on the overhead rack or the top shelf if they are light. Reserve one wall for a workbench zone and keep shelving 18 inches deep or less.
How long does it take to organize a garage from scratch?
A one-car garage of mostly boxes takes a full weekend: one day to empty and sort, one day to measure, clean, zone and shelve. A two-car garage with tools, lawn equipment and a workshop runs two to three weekends. Add half a day per shelving unit if you are drilling into studs rather than using surface anchors.
How do I keep my garage organized after cleaning it?
Give every item one home and one label, then protect the system with rules. Run a five-minute reset each week, keep a donate bin by the door so leftovers leave within a week, and swap seasonal bins once a season. Return heavy things to low shelves and light things up high, so the system rebuilds itself instead of drifting.
Where to Start Tomorrow Morning
Pick three dry days and a parking spot for the car, then buy nothing until the sort is finished. Five labelled stations on the driveway, one item at a time, and a notebook beside you as you work. On the second day, measure the empty room before anything goes back in, because that sketch is what makes the storage fit instead of gather dust.