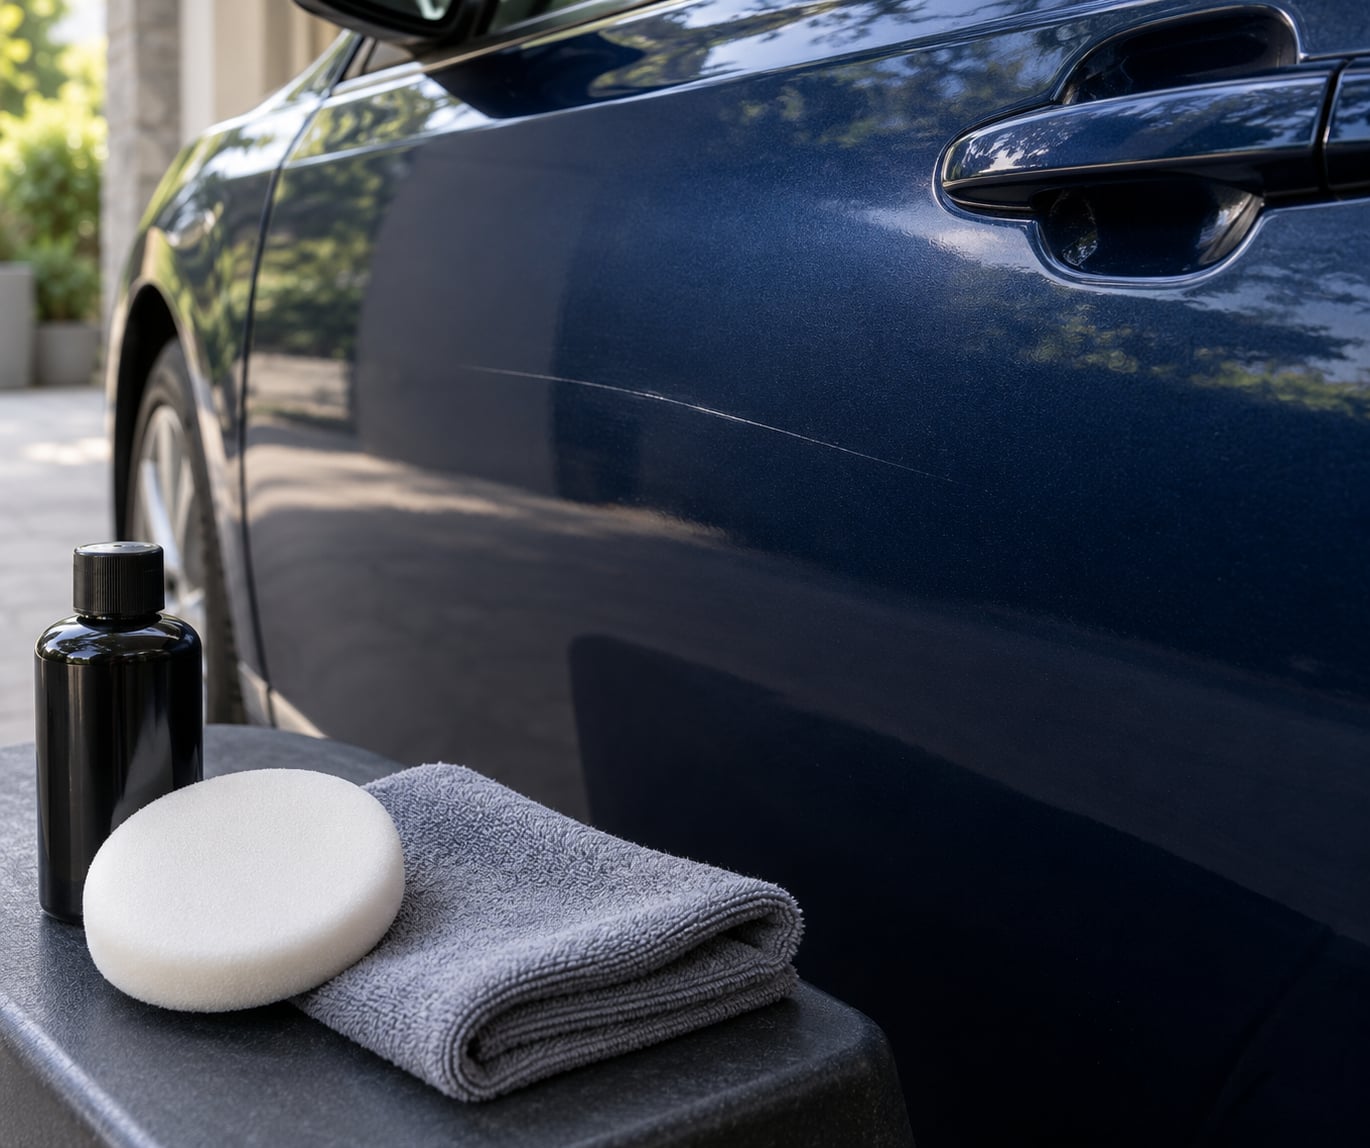
Most light scratches come out by hand with a mild polish and a clean microfiber pad, no machine needed. The whole job takes about 20 to 30 minutes for a single mark once the paint is washed and dry. The catch is depth: if your fingernail catches in the scratch, hand correction will not save it.
I do this on my own cars in the driveway, and the mistake I see most often is grabbing the strongest compound in the shop because it seems like more work per minute. Stronger is not better here. Clear coat is thin, usually around 40 to 60 microns on a modern factory finish, and every pass removes a bit of it permanently.
So this guide walks through the process in order: wash, judge the depth, pick the mildest product that can do the job, work a small section, then protect what you just corrected. Most readers finish the whole thing with one polish and a coat of wax.
Table of Contents
- 1What You Need to Remove Scratches from Car Paint by Hand
- 2Step-by-Step
- 31. Wash and dry the scratched area
- 42. Check whether the scratch is in the clear coat
- 53. Choose the least aggressive treatment first
- 64. Apply the product and work in small sections
- 75. Inspect the result and repeat carefully
- 86. Protect and maintain the repaired paint
- 9Common Mistakes That Make Scratches Worse
- 10Frequently Asked Questions
- 11Can I remove car paint scratches by hand without a machine polisher?
- 12What is the best hand product for removing scratches from car paint?
- 13Does toothpaste really remove scratches from a car?
- 14How long does it take to remove scratches from car paint by hand?
- 15When does a scratch need professional repainting instead of hand correction?
What You Need to Remove Scratches from Car Paint by Hand
For a light surface mark that does not catch a fingernail, the shopping list is short. Most of it you already own or can borrow.
- Automotive shampoo and two buckets. Dish soap leaves a film that polishes smear into. One bucket holds clean rinse water, the other holds your wash solution, and grit stays at the bottom of the wash bucket.
- Clean microfiber towels, at least three. One for washing, one for drying, one dedicated to wiping compound residue. Never reuse a towel that has touched the ground.
- A clay bar or clay mitt. Bonded contaminants sit on top of the clear coat and cut compound into swirls. A clay pass costs about five minutes per panel.
- A mild finishing polish. This is your starting product. Scratch removers and fine finishing polishes handle marks you can barely feel with a fingertip.
- A soft foam hand applicator pad. Foam microfiber or a closed-cell foam pad. Foam is forgiving; a coarse wool pad is not a beginner tool.
- A spray bottle of water or a quick detailer spray. It keeps the product lubricated so you can see the marks you have already removed.
- A wax or sealant and a clean applicator pad. Freshly corrected clear coat is bare and oxidises faster than the rest of the car.
You also want a decent light. A headlamp or a bright LED flashlight held low across the panel shows surface marks in a way overhead garage lighting never does. Working in shade matters too, because direct sun heats the panel and the product flashes over too fast to work.
For marks that are deeper or that reach past the clear coat, add a hand-applied compound for cutting, a finer polish to refine the haze it leaves, and a touch-up pen matched to your paint code. Get the code from the placard inside the driver door jamb or the glove box before you buy anything, because paint that is close but not an exact match will highlight the repair under sunlight.
Step-by-Step
The order below is deliberate. Skipping the wash is the single most common reason a careful correction still ends up with a panel full of new swirl marks.
1. Wash and dry the scratched area
Wash the whole panel, not just the scratch. You are working on a few square feet of clear coat and any dirt left under the pad becomes a grinding particle. Rinse the panel with a steady stream of water before you dry it, then pat it with a clean microfiber towel until it is completely cool and completely dry.
Run your hand across the wet panel. If it feels gritty, the paint is not ready for polish and you need another clay pass. Scrub the dry surface lightly with your fingertips after drying. If you can still feel the mark, it is a texture problem that a polish may solve; if the mark has vanished, it was dirt or water etching and you may not need product at all.
Budget five minutes here. It is the cheapest five minutes in the whole job.
2. Check whether the scratch is in the clear coat
Run your fingernail across the scratch at a slight angle, with light behind it. A clean fingernail that slides over the mark without catching means the scratch lives in the clear coat and hand correction can usually level it. A fingernail that catches means the mark goes through the clear coat into the colour coat, and no amount of hand polishing will fill a gap.
Look at colour too. A scratch that shows white, grey or black has exposed the base coat or primer underneath. Those are body shop work unless the mark is short enough for touch-up paint. A scratch that shows no colour at all is a surface defect, and that is the good case.
Stop the whole process and reassess if the mark turns out to be deeper than you thought. There is no shame in that, and the fingernail test takes ten seconds compared with the hours you would spend levelling clear coat that was never the problem.
3. Choose the least aggressive treatment first
Start with a mild finishing polish or a dedicated scratch remover on a soft foam pad. These products use very fine abrasive particles and they handle the majority of light clear coat marks in a couple of applications. Familiar names in this category include Meguiar’s ScratchX, Turtle Wax scratch removers, Chemical Guys light polishes and Wolfgang finishing glaze.
Move up only if the mild product has done its job and the mark is still visible. A hand-applied compound such as Meguiar’s Ultimate Compound, 3M rubbing compound or a one-step scratch remover cuts faster and takes clear coat with it. Use it sparingly, and follow it with the mild polish again so you are not left with a hazy patch that is worse than the original scratch.
There is a middle path for marks that catch the nail but are only a few millimetres long: wet sand the area with a fine grit pad and lubricating spray, then polish. I would only do that on a clear coat you know is thick, and I would rather send you to a body shop than talk you through sanding. Sanding is how people sand through clear coat by accident.
Touch-up paint handles exposed colour coat, not surface marks. Paint fills a void; it cannot level a scratch that is already sitting level with the surface.
4. Apply the product and work in small sections
Shake the bottle, put a small amount on the pad, and spread it over an area about the size of your palm. More product does not mean faster cutting, it means you are rinsing compound off the panel five times. Work it in with straight lines first, then cross-hatch across those lines, because straight-line motion keeps the abrasive cutting evenly and cross-hatch prevents you from building a swirl pattern.
Use pressure, but not force. You want the weight of your hand and the pad doing the work. When the product has broken down into a milky liquid film and stops feeling gritty under the pad, the job is done for that section. Keep the panel lubricated with a light mist of water or quick detailer spray so the pad never drags dry.
Pick one small section at a time and finish it before moving on. Working over a whole door at once means you cannot tell where the mark disappeared and where it merely got smeared, so you end up over-correcting an area that was already fine.
5. Inspect the result and repeat carefully
Wipe the section with a clean, dry microfiber towel before you judge anything. Polished haze hides the truth until you remove it. Then look at the panel with the light held low and slightly behind you, from about 45 degrees, and compare the corrected area with the rest of the panel from a couple of metres back. That is the viewing distance other people will see it from.
If the mark is still there, make another pass. Most clear coat scratches need three to five applications rather than one, and each application should be followed by a wipe and a fresh look. If your mild polish has stopped making progress after several passes, step down to a slightly more aggressive product rather than pressing harder with the same one.
Know when to stop. Once the mark is difficult to see under angled light, stop, because there is nothing left to remove. Every extra pass is clear coat you will not get back, and a hazy panel is far more visible than a faint scratch.
Allow about 10 minutes of work per mark. A long scratch running along a full door edge can take half an hour, and a badly neglected panel taking three passes over several areas can take an hour or more.
6. Protect and maintain the repaired paint
Let the panel cool to room temperature, then apply a wax or sealant with a clean pad. Follow the product label for cure time before water hits the paint. Wax fills the microscopic texture left behind by polishing and gives the corrected area the same gloss and hydrophobic character as the rest of the car, which is what makes the repair blend in.
A simple spray sealant is easier for most people than a traditional carnauba wax and lasts a few months. Either works. What matters is that fresh clear coat gets protected, because unprotected polished paint oxidises faster and stops matching the panels you did not touch.
Prevention is the rest of the job. Wash with the two-bucket method, dry with a clean microfiber towel every time, and never drag a dirty cloth across a dusty car. The scratches people complain about most are the ones a towel made. Reapply protection every three to four months, and if your car sits outside, check the water beading after rain. When beads stop rolling, the sealant is gone.
Common Mistakes That Make Scratches Worse
Nearly every damaged panel I have seen that started as a light scratch ended up worse because of one of these.
Sanding before you test the depth. Wet sanding sounds like a shortcut and it works well on deep marks, but on a shallow clear coat scratch it removes far more material than the problem required. Test first, sand last.
Pressing hard instead of working more. Pressure does not speed up abrasion, it just generates heat and drags the pad. Let the product cut and keep the pad moving.
Treating a base coat scratch like a surface mark. Polishing over a scratch that shows colour can lighten it and spread the damage without ever filling the void. That is the moment to look up your paint code or call a body shop.
Working a hot panel or in direct sun. Paint in the sun flash-evaporates the lubricant and the compound bakes onto the surface, which produces haze you then chase with more passes. Work in shade on a cool panel, roughly between 10 and 27 degrees Celsius.
Doing the whole car in one session. Fatigue leads to heavy hands and uneven pressure. Break the job into panels across two or three sessions in the shade.
Skipping the clay bar. Bonded dirt and fallout under a pad become a sanding disc. Five minutes of claying can save an hour of correcting swirls you just created.
Reusing a dirty towel. The single most common source of new swirl marks. Keep separate towels for washing, drying, and compound residue, and launder them before they return to the job.
Using household fixes. Toothpaste, WD-40, and the coconut oil and vinegar mixture that circulates online are all worth skipping. Toothpaste is an abrasive designed for teeth; it leaves a hazy, uneven finish that shows badly on dark paint. WD-40 is a lubricant and solvent, so it will soften a fresh touch-up repair while doing nothing for an old scratch. Vinegar is acidic, and acids dull clear coat over time. None of them level anything.
Leaving corrected paint bare. Without wax or sealant the repaired area oxidises faster than its neighbours and the difference becomes obvious within a few months of hard sun.
Hand correction takes more finesse and more patience than machine work, because you feel the paint through the pad instead of reading it off a machine dial. That patience is the part that protects your clear coat.
Frequently Asked Questions
Can I remove car paint scratches by hand without a machine polisher?
Yes. Light scratches that stay in the clear coat can usually be improved by hand with a mild polish, a hand-applied compound or a dedicated scratch remover on a foam applicator pad. Wash and dry the panel first, use the mildest product that works, and work in small sections. Hand correction is slower than a machine but safer on thin clear coat and better in tight spots.
What is the best hand product for removing scratches from car paint?
A mild automotive finishing polish is the safest starting point for fine surface marks, because it removes very little clear coat per pass. For slightly deeper clear coat scratches, a hand-applied compound cuts faster and should be followed by the mild polish to clear the haze it leaves. Popular picks include Meguiar’s ScratchX, Meguiar’s Ultimate Compound, Turtle Wax scratch removals and Chemical Guys polishes.
Does toothpaste really remove scratches from a car?
No, and it can make the finish worse. Toothpaste is mildly abrasive and designed for tooth enamel, so it leaves a hazy, uneven gloss that stands out badly on dark or metallic paint. Automotive polishes use graded abrasives sized and suspended for clear coat, which is what lets them level the surface evenly. Use a real paint polish instead, and save the toothpaste.
How long does it take to remove scratches from car paint by hand?
A light surface scratch usually takes 10 to 30 minutes in total, including washing, claying, polishing and protecting. Deeper clear coat marks that need several applications can take 30 to 60 minutes, and a full-panel correction runs two to three hours. Set up in the shade, work one small section at a time, and expect three to five applications before a stubborn mark fades.
When does a scratch need professional repainting instead of hand correction?
Hand correction only works when the scratch lives entirely inside the clear coat. If your fingernail catches in the mark, or the scratch shows white, grey or black because the colour coat is exposed, polishing will not help. Short marks that expose colour can sometimes be handled with touch-up paint matched to your paint code. Larger damaged areas, or scratches near a panel edge, a crease or a door jamb, belong in a body shop.
Start with the panel washed and dry, run your fingernail across the mark, and pick the mildest polish rather than the strongest. If the nail catches or colour shows through, find your paint code before you buy anything.