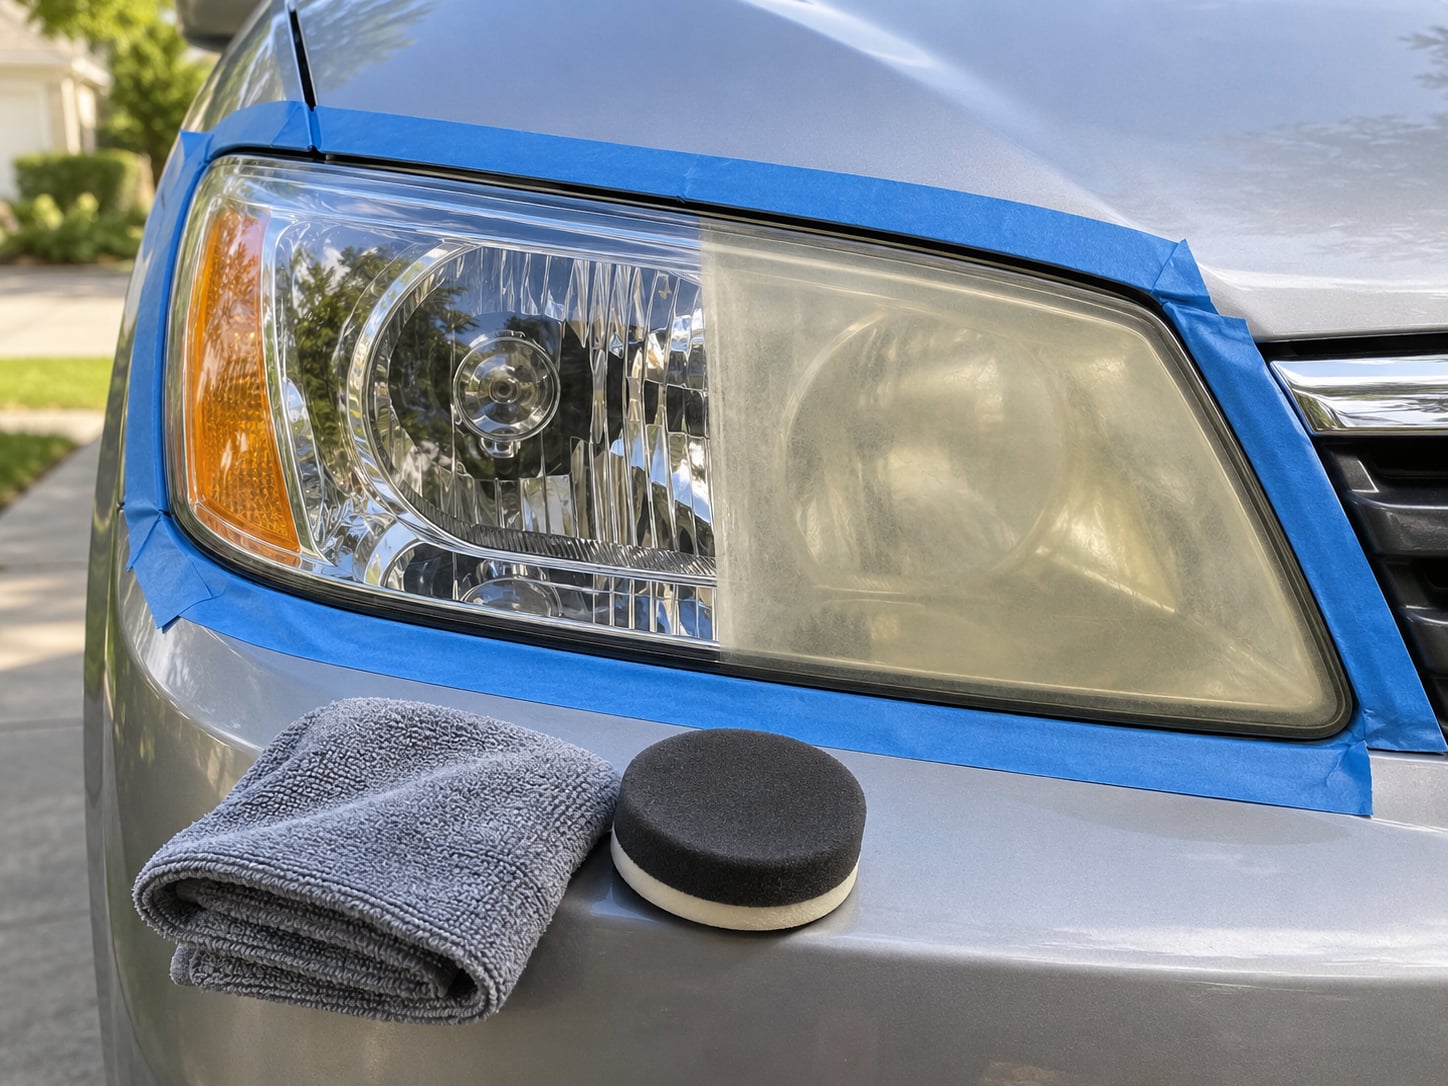
Foggy headlights are polycarbonate lenses whose factory clear coat has been broken down by sunlight, heat and road grime, so the plastic underneath oxidizes into a yellow, chalky haze that eats your night-time beam. To clean car headlights that look foggy, wash the lens, polish away the dead surface layer, and seal it with UV protection. A polish-and-seal job takes 30 to 45 minutes for a pair. Wet sanding for heavy yellowing adds another hour per lens.
Most people only need the gentle version. The aggressive sanding guides online assume lenses that have been baked for ten years, and doing that to a mildly hazy lens is how you end up with scratches that never come out.
This guide walks through the gentle method first, then the sanding method for lenses that need it, plus an honest verdict on the home remedies that show up in every forum thread: toothpaste, baking soda, WD-40, magic eraser and aluminium foil.
Table of Contents
- 1What You Need
- 2How to Clean Car Headlights That Look Foggy: Step by Step
- 31. Test the headlight lens before cleaning
- 42. Protect the paint and trim
- 53. Wash away loose dirt and grime
- 64. Treat the remaining yellowed or hazy areas
- 75. Rinse, dry, and inspect the result
- 86. Protect the headlights for longer
- 9Common Mistakes
- 10Using WD-40 as a cleaner
- 11Scrubbing with something abrasive
- 12Sanding dry
- 13Applying product to a warm headlight
- 14Skipping the masking tape
- 15Sanding a lens that is cloudy on the inside
- 16Expecting restoration to fix cracks
- 17Doing it the week before selling the car
- 18Rinsing a hose straight into the housing seam
- 19Frequently Asked Questions
- 20Can I use toothpaste to clean foggy car headlights?
- 21How long does it take to clean foggy car headlights?
- 22Is it safe to use baking soda or baking powder on headlights?
- 23What if my headlight is cloudy inside the lens?
- 24Should I replace a headlight if cleaning does not make it clear?
- 25How do I keep car headlights from getting foggy again?
What You Need
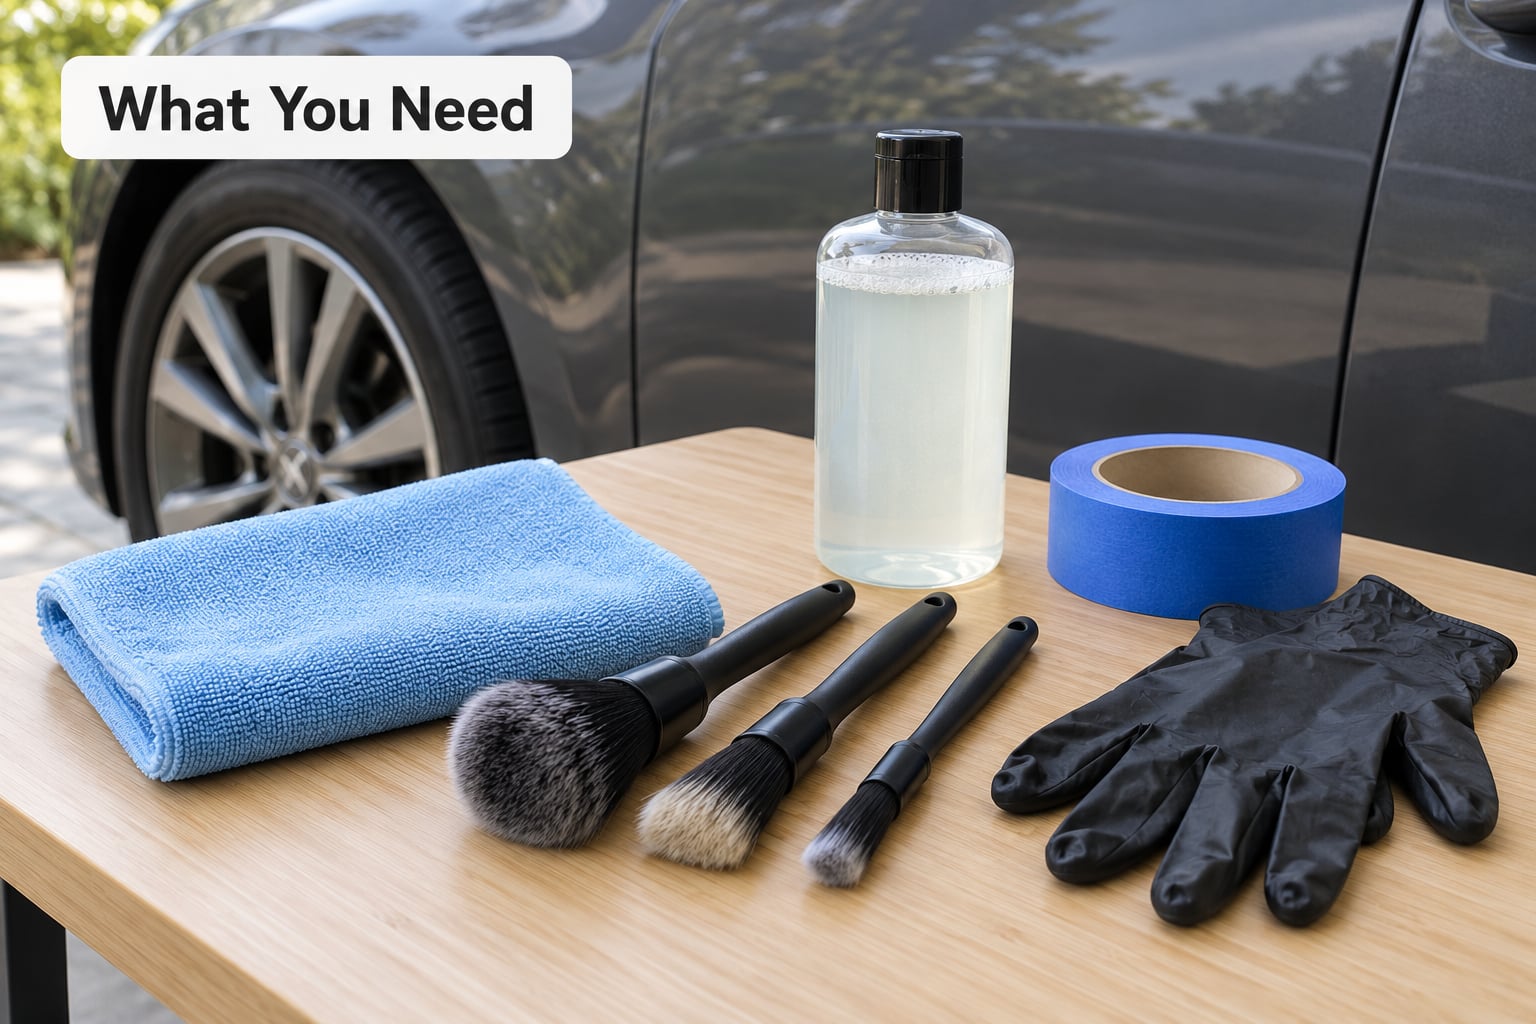
A gentle headlight clean needs fewer supplies than most people assume. The expensive-looking list in restoration kits is mostly paper towels and marketing.
- Mild dish soap and lukewarm water for the wash stage. Nothing here needs to be hot. Hot water and a warm lens are how you stress the plastic.
- Clean microfiber cloths, at least two. One for washing, one for drying and buffing, kept separate.
- A soft detailing brush or a soft-bristled toothbrush for the grille edges and the housing seam where bugs and grit pack in.
- Painter’s tape to mask the paint, chrome and grille around the lens before any abrasive touches it.
- Gloves for the sanding and polishing stages. You will be working near paint, and nitrile gloves keep oils off a clean lens.
- A purpose-made headlight polish or restoration wipe. This is the item that does the actual work.
- Optional: a UV-resistant headlight sealant or clear coat, wet/dry sandpaper in 1000, 2000 and 3000 grit for badly yellowed lenses, and a foam applicator pad or small polisher for larger lenses.
The tape is the one people skip and the one that matters most. Polishing compound will haze adjacent paint fast, and a pass of compound across a black grille turns it permanently grey.
How to Clean Car Headlights That Look Foggy: Step by Step
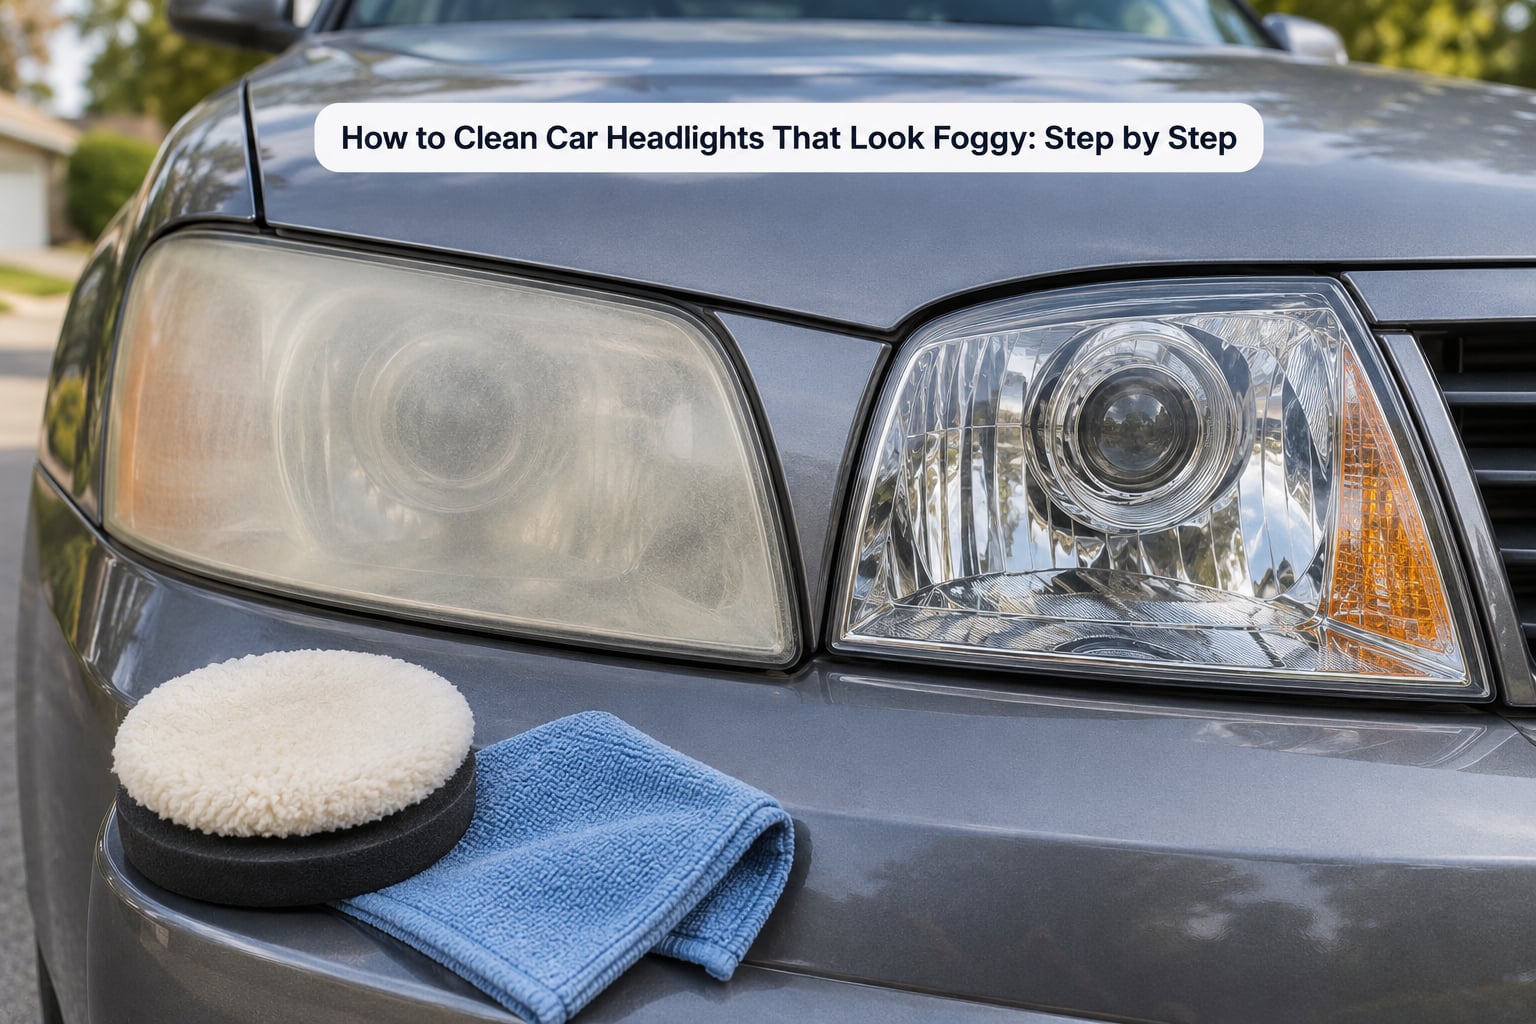
Work in daylight if you can, on a cool car, and never start with the lens still warm from a drive. Six steps cover it.
1. Test the headlight lens before cleaning
Start by working out whether the fog sits on the outside of the lens or inside it, because the two problems need opposite treatment. Outside haze feels chalky or rough under your fingertip and wipes off as a film. Internal condensation looks like droplets behind the lens, or fog that appears after a car wash and clears within an hour or two.
Run a fingernail lightly across the lens. A rough, gritty surface means external oxidation you can polish. A perfectly smooth surface that still looks cloudy means the haze is inside, and sanding the outside will achieve nothing except thinner plastic.
Park the car in the shade and let the headlight cool completely. Warm lens plus abrasive plus motion equals micro-crazing you cannot polish out later.
2. Protect the paint and trim
Wash the headlight area first with mild dish soap and lukewarm water, then dry it. Grime under the lens edge will drag your cloth across paint and scratch it.
Clear bugs and road grime out of the housing seam with a soft detailing brush dipped in soapy water. No scrapers, no picks, no picking dried bug guts off bare plastic. Bugs come off far easier after a soak than after scraping.
Tape painter’s tape in a border roughly a centimetre out from the lens edge, following the housing seam. Rub the tape down firmly so nothing lifts. If the grille slats or chrome bezel sit close, mask those too. This step takes two minutes and saves the paint job that follows.
3. Wash away loose dirt and grime
To clean car headlights that look foggy without scratching them, put a small amount of dish soap in a bowl of lukewarm water and wash the lens with a wet microfiber cloth. Work in overlapping passes, turning the cloth often so grit does not get carried across the plastic.
Skip abrasive household cleaners, degreasers and brake cleaner. They strip the clear coat faster than any polish will and leave a lens that looks worse than when you started.
Keep the pressure water away from the housing. Do not aim a pressure washer straight at the seam, since water forced past the seal is what causes the internal condensation people try to fix later.
4. Treat the remaining yellowed or hazy areas
Once the lens is clean and dry, apply a small amount of headlight polish in thin, even lines across the surface. Work it in with a damp cloth or foam applicator pad using light, overlapping pressure.
Give it a few minutes to break down the oxidized layer, then buff hard with a clean microfiber cloth until the residue lifts. Repeat two or three times, adding a small fresh amount each time rather than one heavy coat.
If a yellowed lens still has haze after several passes, move to wet sanding. Use 1000 grit wet/dry paper with plenty of water, then 2000, then 3000. Change direction at each grit: 1000 horizontal strokes, 2000 vertical, 3000 circular. Keep the surface wet the whole time, because dry sanding is the single fastest way to permanently scratch a headlight.
Stop immediately if the lens turns hot under your hand or if you see any white stress marks or star-shaped crazing. Both mean you have gone too deep, and no amount of polishing will hide that.
5. Rinse, dry, and inspect the result
Rinse the polished lens with a gentle stream of water and a clean microfiber towel, then dry with a second towel until there is no moisture left. Chemical restorers often need a couple of minutes to haze and lift fully, so buff once more after a few minutes.
Peel the tape off slowly at a low angle. Pull it straight back and it can take a small piece of clear coat or paint flake with it.
Check the work after dark, which is the only honest test. Park facing a wall or garage door and compare the treated lens with the untreated one, then compare against a wall or fence lit only by your headlights. If the restored lens still throws a wide soft halo rather than a defined beam pattern, there is haze left to remove.
6. Protect the headlights for longer
A restored lens that never gets sealed will be hazy again within weeks, and people usually blame the product rather than the missing last step. Apply a UV-resistant headlight sealant or a two-part automotive clear coat according to its instructions, giving each coat the curing time stated on the can.
Spray clear coat outside with good ventilation and well away from the paint, and mask the surrounding bodywork before you start. The finish goes on cloudy and cures clear.
Reapply every twelve months or so, or whenever water stops beading on the surface. Garage-parked cars can go longer. This last step is what turns a weekend clean into a two-year result.
Common Mistakes
Almost every disappointing result traces back to one of these.
Using WD-40 as a cleaner
WD-40 does not remove oxidation. It leaves a thin oily film that makes the lens look shinier for a few days, then the haze returns exactly as it was. Forum users describe the shine wearing off and having to reapply constantly, which eventually dulls the plastic. If you have already sprayed it, wipe it off with a degreaser and a microfiber cloth before you polish.
Scrubbing with something abrasive
Steel wool, scouring pads, magic erasers and even some green sponges leave fine scratches that scatter light worse than the original haze did. Use soft cloth or foam only, and let the compound do the cutting.
Sanding dry
Water is the lubricant that carries grit away. Dry sanding grinds debris into the plastic and leaves a scratch pattern no polish fully removes. Keep the lens soaked, rinse between grits, and change paper the moment it dulls.
Applying product to a warm headlight
Heat softens polycarbonate and makes it far easier to scratch, craze or distort. Park in the shade and wait. This one costs nothing to get right.
Skipping the masking tape
Polish overspray and sealant overspray will dull adjacent black plastic and chrome. Tape takes minutes and prevents a repaint.
Sanding a lens that is cloudy on the inside
Internal condensation cannot be polished out. If the fog is behind the lens, the fix is a vent port or a gasket issue, and the surface needs nothing but soap and water.
Expecting restoration to fix cracks
Cracks, burned or pitted chrome reflectors inside the housing, and moisture that keeps returning are replacement problems. No amount of polish reaches any of them.
Doing it the week before selling the car
A fresh restore needs a sealant and curing time. Started too late, the lenses look great in the driveway and hazy again on the buyer’s first night drive.
Rinsing a hose straight into the housing seam
Forced water past a tired seal is one of the main causes of the internal fog you are trying to prevent. Rinse the lens, not the seam.
Frequently Asked Questions
Can I use toothpaste to clean foggy car headlights?
Toothpaste has mild abrasives, so it can take off a light haze on a barely yellowed lens. On a lens that has been yellow for years, it leaves streaks and takes far longer than a purpose-made polish. Use plain white toothpaste, not gel or whitening formulas.
How long does it take to clean foggy car headlights?
A wash and a dedicated headlight polish takes 30 to 45 minutes for a pair of headlights. Adding wet sanding pushes a full restore past an hour per lens, plus drying time for the sealant. Set aside an afternoon the first time and a much shorter touch-up every few months.
Is it safe to use baking soda or baking powder on headlights?
Baking soda is a very gentle abrasive, so it is safer than toothpaste and fine for light haze. Baking powder is less abrasive still and does almost nothing to real oxidation. Both are worth a try, but neither will clear a properly yellowed lens. Wet sanding plus a polish will.
What if my headlight is cloudy inside the lens?
Cleaning the outside will not help if the haze is inside. Look for droplets that sit behind the lens, or a fog that starts after a car wash and clears in a few hours. Blocked vent ports on the housing and a tired factory gasket cause this. Salt air makes it worse and a shop can replace the seal.
Should I replace a headlight if cleaning does not make it clear?
Replace it when the plastic is cracked, when the chrome reflector inside has burned or pitted, or when deep sanding leaves white streaks that no polish removes. A bright, even beam with a few faint marks means keep cleaning. If moisture keeps coming back from inside, the lens seal is the problem, not the surface.
How do I keep car headlights from getting foggy again?
Keep the lens sealed. Apply a UV-resistant headlight sealant or clear coat after cleaning and refresh it every 12 months or so, which slows the oxidation that causes the fog in the first place. Wash with touchless or hand methods instead of automatic brushes, and park in a garage when you can.
Start at the lens, not at the products. If it feels rough, a wash, a dedicated headlight polish and a UV sealant will bring back most of your light for well under an hour of work. Save wet sanding for lenses that stay yellow after two or three polish passes, and seal whatever you do so it lasts more than a few weeks.