Learning how to make a cosplay costume for beginners comes down to planning, not perfect stitching. You pick a character whose outfit you can realistically build, split it into separate pieces, decide which parts you will make, modify, or buy, then cut, sew, fit, and finish. A first costume usually takes somewhere between 20 and 40 hours of hands-on work spread over a few weeks, and you can absolutely do it with no sewing experience at all.
Cosplay simply means dressing as a character from a film, game, comic, or anime, usually with a costume you made or altered yourself. What separates cosplay from a generic Halloween costume is that it recreates one specific character, which means the details matter and the whole look has to hang together on the day.
Beginners are the norm in cosplay communities, not the exception. Long-time cosplayers on r/cosplayers regularly describe first builds full of uneven seams, visible glue, and a wig in the wrong shade, and they still walked into a convention and had a great day. Get that expectation set early and the whole process gets much less stressful.
Table of Contents
- 1What You Need
- 2One-time tools worth buying
- 3Tools you can add later
- 4Safety kit for foam and props
- 5Consumables and materials
- 6Step-by-Step
- 7How to Make a Cosplay Costume for Beginners: Plan the Build
- 8Create a Costume Design and Pattern
- 9Choose Fabric and Notions
- 10Cut and Mark the Costume Pieces
- 11Assemble the Main Garments
- 12Add Details and Accessories
- 13Fit, Adjust, and Finish the Costume
- 14Common Mistakes While You Build
- 15Common Mistakes and Quick Fixes
- 16Frequently Asked Questions
- 17Do I need to know how to sew to make a cosplay costume?
- 18What is the easiest character costume for a complete beginner?
- 19How much does it cost to make a cosplay costume at home?
- 20What fabric is best for a first cosplay costume?
- 21How long does it take to make a beginner cosplay costume?
- 22Conclusion
What You Need
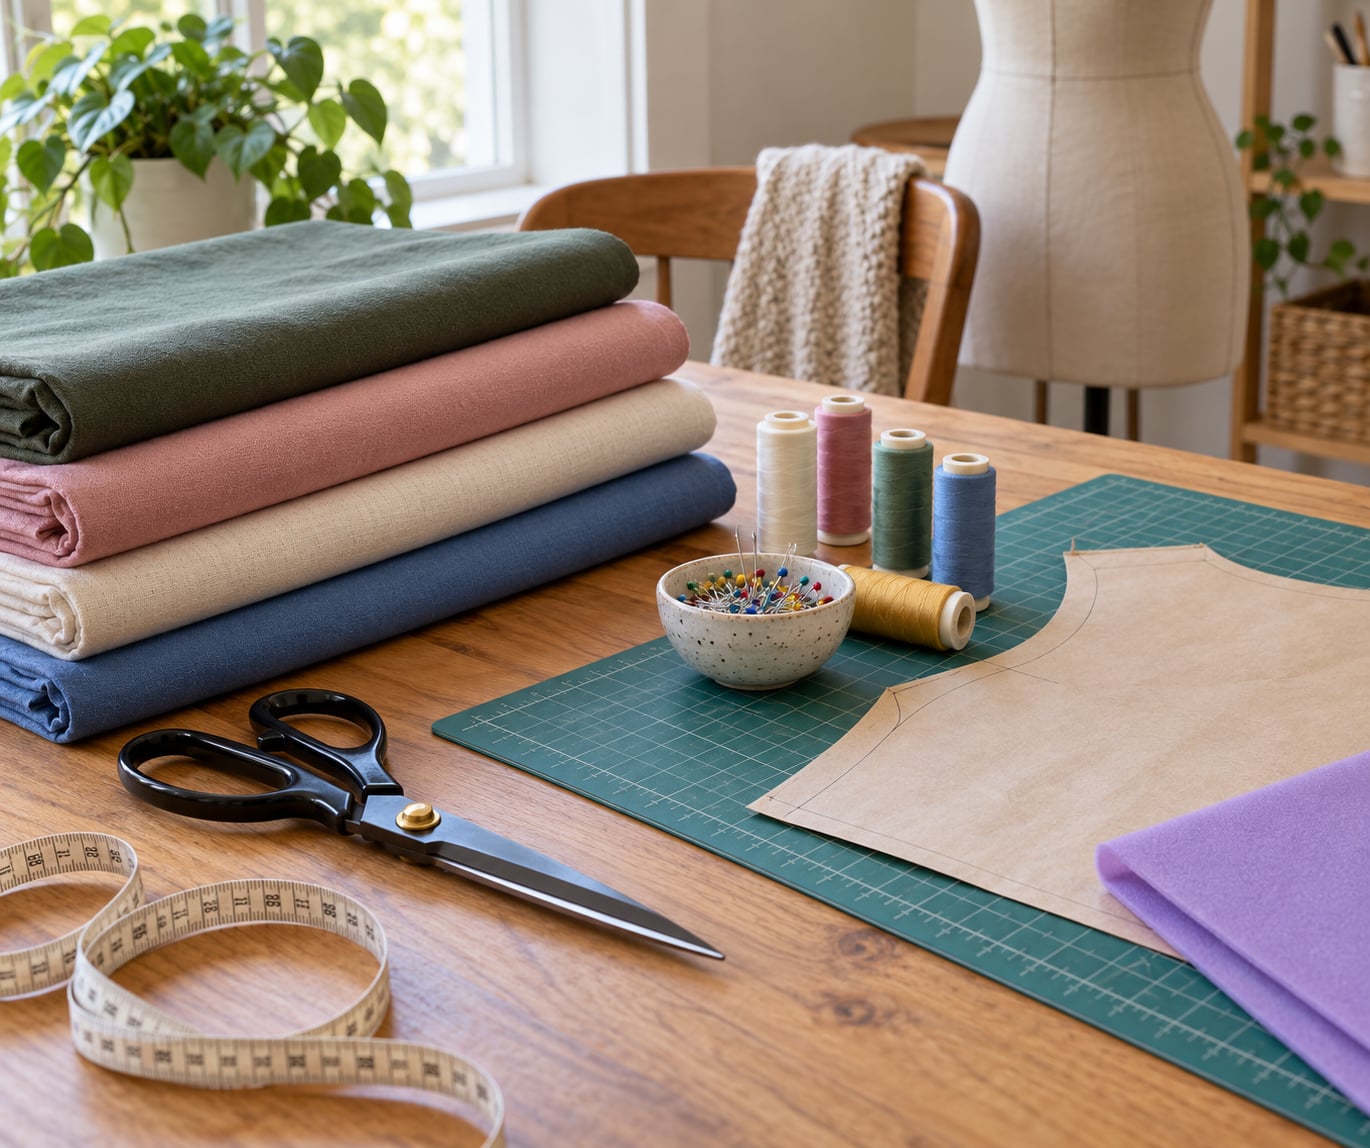
You do not need a professional workroom. You need a sewing machine or a needle and thread, a cutting surface, iron, and a small set of tools, plus the actual materials for your character. Splitting the list into one-time tools and consumable materials makes the first purchase far easier to budget.
One-time tools worth buying
- Fabric shears — proper dressmaking scissors cut through layers cleanly and save you from jagged edges that show after sewing.
- Pinning equipment — glass-head pins hold slippery stretch fabric in place where plastic-headed pins leave holes.
- Seam ripper — the single most-used tool in a first build, because mistakes are guaranteed and unpicking is faster than re-cutting.
- Tailor’s chalk or washable marker — for marking pattern pieces directly on fabric.
- A measuring tape and a small notebook — for your measurements and for writing corrections after each fitting.
- Tape measure, long ruler, and a cutting mat — a self-healing mat protects your table and your blades.
- Rotary cutter — worth adding once you are cutting foam or multiple layers, less necessary if you are sewing your first garment.
Tools you can add later
A heat gun and foam-cutting tools matter only if your character has props. A serrated knife, a rotary tool, and a shaping jig are worth buying once you know which pieces you actually need, not before. If your character is fabric-only, skip all of it.
Safety kit for foam and props
Wear a dust mask or respirator whenever you sand EVA foam, cut it with a rotary tool, or sand a finished prop; the dust is genuinely unpleasant for your lungs. Keep a heat gun on a non-flammable surface and let foam cool in your hands before bending it, because hot foam tears easily. Never build a prop that functions as a real weapon.
Consumables and materials
Buy these once you have your pattern list: fabric, matching thread, interfacing where structure is needed, a zipper, snaps and hook-and-eye closures, elastic, trim, and any craft foam or thermoplastic sheets. Add interfacing to collars, cuffs, waistbands, and hats — thin fabric without support collapses the moment you put it on.
Step-by-Step
Work through these eight stages in order. Each one has a quick check that tells you whether it worked, and if the check passes, move to the next stage.
How to Make a Cosplay Costume for Beginners: Plan the Build
Choose a character whose costume resembles things you already understand. People on r/CosplayHelp give this advice constantly: pick someone whose everyday wardrobe already resembles their outfit, because you are mostly reusing construction methods you already know. A character in a plain shirt, trousers, boots, and a jacket is a far better first project than one in sculpted armor with a custom-built weapon.
Set the purpose before anything else. A costume worn for four hours in a crowded convention hall has very different requirements from one worn for a two-hour photo shoot, and the requirements drive your fabric, closures, and padding choices.
Then take accurate body measurements: chest, waist, hips, torso length from shoulder to waist, shoulder width, inseam, and sleeve length from shoulder to wrist. Measure over the underwear and base layers you will actually wear on the day, because a costume measured over a thick hoodie will not fit over one. Write them down twice and do not lose the second copy.
Finally, set a deadline and a budget you can live with. Cosplay communities are full of people who panicked two weeks out from a con with half a costume and no plan, and working backwards from the event date is the fix. Your plan works when every essential garment and accessory has a line in the project list with a status attached.
Create a Costume Design and Pattern
Collect reference images from every angle: front, back, both sides, close-ups of every closure and emblem, and shots of the costume in motion. Screenshots beat links because links break, and a single folder of images makes comparison far faster than tab-hopping. Note details that change between scenes, like a jacket that is open in some shots, so you do not pattern a shape that is an accident of one pose.
Break the look into components and label each one: top, bottoms, outerwear, footwear, headwear, each prop, and each accessory. For each component, write a one-line description of its shape, fabric weight, and color. This list is your pattern inventory.
Use a commercial pattern where one exists, choosing a size and then adjusting it to your measurements. If nothing matches, trace the reference outline at the correct scale, add a seam allowance, and cut a quick muslin version to test the shape — muslin is cheap cotton, and it catches fit problems before you spend real fabric. The pattern works when every major piece is labeled with its name, size, grain line, and quantity before you cut anything.
Choose Fabric and Notions
Match fabric weight and stretch to each garment rather than to the screen image. A costume that looks like a heavy structured coat in a render often needs only medium-weight cotton with interfacing, and that is far easier to sew and far cooler to wear for a full convention day. Stretch pleather, spandex, and knits need a stretch stitch and a ballpoint needle; they also stretch during fitting, so size them down slightly.
Calculate yardage with a real allowance: the pattern’s stated amount, plus ten to fifteen percent for the layout, plus extra if you are matching a print or plaid. Notions matter as much as fabric, so get them on the same shopping list: thread in the actual fabric color, a zipper longer than the opening needs, snaps and hook-and-eye for closures, elastic, interfacing, and trim. The materials are ready when your cutting layout includes every pattern piece and every matching supply is in the same room.
Match the fabric to the part of the costume it actually has to do. This short list covers most of what a first build needs, and it is ordered by how forgiving each material is.
| Fabric | Best use | Sewing notes |
|---|---|---|
| Cotton | Shirts, trousers, jacket linings, first builds generally | Forgiving, cheap, easy to press, mistakes do not ruin the piece |
| Cotton canvas | Jackets, bags, panels that need to hold shape | Heavy, so use a longer stitch and a sharp needle |
| Interfaced cotton | Collars, cuffs, waistbands, hats, breastplates | The cheapest way to get structure without specialty fabric |
| Stretch pleather | Pants, jackets, and trim on sci-fi and superhero outfits | Use a stretch stitch, ballpoint needle, and press cloth; it does not press like cotton |
| Spandex and knit | Bodysuits, leggings, stretch panels | Use a ballpoint needle, do not pull while sewing, and size down slightly |
| Vinyl and faux leather | Armor-style panels, boot covers, hard trim | Can pucker and show stitch marks; use a walking foot if you have one |
| Sheer or mesh | Layered undershirts, stockings, sheer overskirts | Use a rolled hem or stay tape; it is always the piece that rips first |
Test drape before you commit: hold a folded length of the fabric over your shoulder and move your arm. If it pulls or drags in a way the character never does, you picked the wrong weight.
Cut and Mark the Costume Pieces
Wash and iron your fabric first. Most fabric shrinkage happens on first contact with water, and cutting before washing means garments that no longer fit later. Iron the grain straight, then transfer your pattern pieces with chalk and label every piece the moment you cut it — two identical sleeve pieces both marked “sleeve” save real confusion later.
Keep the grain line honest and keep seam allowances consistent. A half inch works for most wovens; go narrower on knit and stretch fabric so the seam does not ripple. Cut your largest or most delicate pieces first, since fabric distortion shows up as a curved, wobbly edge, and cutting small stable pieces afterward uses the distorted area as leftover. Your pieces are cut successfully when symmetrical pieces match and the fabric still lies flat on the table instead of curling.
Assemble the Main Garments
Sew in a workable order rather than the order the pattern lists: set sleeves in, close side seams, then do shoulders, cuffs, and hems. Pin and baste first so you can correct the fit before the seam is permanent. Test-fitting before the main seam is closed is the cheapest fix available to you.
Finish internal seams with a zigzag or overlock stitch if you have one, and install closures while the garment is still flat. Adding a zipper to a fully assembled garment with no access to the opening is genuinely painful. Each garment is structurally sound when seams are secure, raw edges are enclosed, and you can get into it and out of it without forcing anything.
Add Details and Accessories
Now attach the character-defining work: collars, cuffs, belts, capes, appliques, trim, and painted or foam details. Substitute safe materials for rigid or heavy ones. Worbla and resin look great but crack in a suitcase; EVA foam in two or five millimetre sheets with contact cement holds the same silhouette and packs flat. Brush a thin coat of sealant over finished foam before painting, which keeps the edges from looking crumbly and paint from sinking in unevenly.
Attach trim with a stitch, not a guess. Use a basting stitch to check length before committing, and test any fabric paint or dye on a hidden seam first — bleeds are the classic beginner surprise. The details are complete when everything sits flat, lines up with the design, and does not restrict your shoulders, elbows, or hips.
Fit, Adjust, and Finish the Costume
Put the whole costume on with the base layers and shoes you will wear on the day. Pin the tight spots at the side seams, waist, armscye, and shoulder, then take the pins out, mark those spots, and alter the seams properly. Then move: walk, sit, raise your arms, and bend at the waist, because a costume that only works while standing still will not survive a convention day.
Finish every visible raw edge, check all hardware, and add small hidden pockets for a phone and a badge if your outfit has a natural place for them. The costume works when you can dress yourself without wrestling it, wear it for the full planned duration, and stay secure during movement. Then do a full test wear, ideally with someone who can watch for gaps and loose threads while you move.
Common Mistakes While You Build
Most early errors are structural rather than artistic: missing seam allowances, fabric that does not behave like the reference, unfinished edges, and a design that was too ambitious for the deadline. Catching each one at the stage where you can still change it is the whole game.
Check your seam allowance before the first cut, not after the first seam puckers. Keep a scrap of your actual fabric and sew two practice seams before committing to the main garment, especially on stretch or pleather. And if the design is running late, cut a simpler version now — a finished simplified costume is worth far more at a convention than an ambitious unfinished one.
Common Mistakes and Quick Fixes
These are the errors beginners report most, with the fastest correction for each. Match your symptom against the list before you redo anything from scratch.
| Mistake | Quick fix |
|---|---|
| Measuring over base layers or guessing between two sizes | Re-measure over the exact layers and shoes you will wear, then take the pattern to your measurements instead of relying on a labeled size. |
| No seam allowance, or an uneven one | Trim allowances back to a consistent half inch and re-sew; puckered seams usually mean a seam was pulled while sewing. |
| Fabric that does not behave like the costume | Test drape on a folded length before buying, and add interfacing or a layer of lining where stiffness is missing. |
| Rough, crumbly foam edges | Sand with progressively finer grit, fill gaps with a filler, seal the surface, then paint in thin coats. |
| Seams and joints that gape or split open | Add stitching over the joint and reinforce inside with tape; contact cement alone is not a structural connection. |
| Wig tangles or sits in the wrong shade | Detangle in sections from the ends upward, and check the shade against your character references before committing to a style. |
| Unfinished edges showing | Bind with bias tape or facing rather than leaving raw seams; this also stops edges fraying during the day. |
| Overcomplicated first design | Cut one component now, get it wearable, then add the next. A finished half-costume beats a perfect plan. |
A few habits save hours. Work in stages with a short session and a definite end point rather than an open evening, since motivation commonly drops partway through a long build and a scheduled stopping point protects it. Finish one garment completely before starting the next. And keep a repair kit in your bag on the day: safety pins, fabric tape, a small seam ripper, spare thread, double-sided tape, and hair ties for hair that will not cooperate.
If cost is the barrier, cosplay with thrifted clothing, cardboard, and hot glue is a legitimate route that people on r/cosplay recommend regularly. Modify what you find rather than building from scratch, and buy the one piece that matters most to recognition, which is usually the wig or a signature color block. Commissioning is not cheating either; wigs and complex props are frequently bought outright so the rest of the build can go where your time is better spent.
Frequently Asked Questions
Do I need to know how to sew to make a cosplay costume?
No. Plenty of first cosplays are built with no machine at all: hand stitch using a running stitch, backstitch, and whip stitch; use iron-on fusible interfacing and fabric glue for hems and simple joins; or modify thrifted garments with hem tape. A machine only makes big projects faster. If you can sew a straight line by hand, you can finish a real costume.
What is the easiest character costume for a complete beginner?
Pick a character whose outfit matches everyday clothes: a shirt and trousers, a jacket over a t-shirt, boots, and simple accessories. Characters with lots of armor, capes, or custom props take the longest, while characters with ordinary street clothing let you start from thrifted garments and focus on color blocking and fit. Recognition usually comes from styling, not complexity.
How much does it cost to make a cosplay costume at home?
It depends almost entirely on how much you make versus buy. A thrift-and-modify build with a purchased wig is the cheapest route. A full from-scratch build with specialty fabric, craft foam, notions, and a styled wig sits far higher, and commissioned wigs or armor push it higher again. Track every receipt from the start, because forgetting thread and shipping is what surprises beginners.
What fabric is best for a first cosplay costume?
Medium-weight cotton is the easiest and most forgiving starting point, and it is cheap enough that mistakes do not hurt. Use interfacing on collars, cuffs, and waistbands for structure. Save stretch pleather, spandex, and knits for later unless the character requires them, because those fabrics need a stretch stitch, a ballpoint needle, and careful fitting to look right.
How long does it take to make a beginner cosplay costume?
Budget roughly 20 to 40 hours of hands-on work for a first costume, plus shopping and waiting time. Cutting and sewing takes maybe a third of that, while detailing, wig styling, and paint curing take the rest. Spread it across several weeks with fixed deadlines, and reduce scope rather than compressing the schedule if you fall behind.
Conclusion
Making a cosplay costume as a beginner is eight stages: plan the build, create the design and pattern, choose fabric and notions, cut and mark, assemble the garments, add details, fit and finish, and check for mistakes as you go. Work in that order and each stage tells you what the next one needs.
Start today rather than waiting for the perfect moment. Choose a character whose clothing you can realistically reproduce, gather reference images from every angle, take your measurements properly, set a budget you will actually stay inside, and build one garment to completion before starting the next.
If I could undo one thing about my own first attempt, it would be the month I spent perfecting a collar instead of wearing a wearable version on the day. You will wear the result in 2026, seams and all, and the second build comes faster than the first ever did.